One of the most significant hurdles for home design professionals in the construction industry is figuring out which software is the right choice for their projects. For compatibility, there are Microsoft and Mac software programs to choose from. These can range from basic, open-source design tools to advanced programs with add-ons and plugins. Then there is the cost to consider, which can be free to tens of thousands of dollars.
Another issue is that many of these computer-aided design software tools are designed to simulate different things. They work in different phases of the construction process, meaning you need to know how each phase evolves when making the best choice for your workflow. Either way, once you understand the general CAD software principles, it is easier to understand and pick up new CAD software.
There are many different types of construction design software, and they are generally categorized by which profession they are made for.
Software for a civil engineer won’t work the same way when the chief architect uses it. You also need to understand building information modeling (BIM), which is the general category that most construction CAD software falls into. However, your choice for architectural design, interior design, and building design software in the industry will always start with your specific situation.
Software for reliable 2D and 3D drafting
While not specifically built for construction, AutoCAD is the grandfather of professional CAD software. Over the years, it has set the trends in this industry and paved the way for other user-friendly programs such as SketchUp. It has toolkits for many industries, but its architecture toolset is notably quite advanced. With this tool, you can design 2D and 3D models. You can also do things like compare drawings and count objects. AutoCAD also makes it easy to do 2D floor plans, 3D floor plans, elevations, and 3D designs. It gives you all the tools you need to create a useful 3D model that represents what you are trying to create.
An affordable entry-level CAD system
Rhino is used by architects and engineers to design, model, present, and analyze various projects. It has multiple editing modes, meaning you can utilize NURBS or traditional geometric tools to create blueprints. It also meshes with a whole host of CAM, engineering, and rendering suites. The best thing about this program is how affordable it is compared to its competition. It even has integration with various digital fabrication tools. For example, it can be utilized with 3D printing equipment.
Coordination software that includes clash detection and advanced collaboration
Autodesk Navisworks Manage is an industry leader in advanced collaboration and clash detection. It allows users to combine all design and construction data (architectural, civil, MEP, etc.) into a single model without the dreaded lag common with other programs. This function offers exploration of aggregate models in real-time for advanced visualization and clash detection—a tool that identifies and reports any cross-discipline interferences (clashes). Many users report these features being invaluable both in the early and finishing stages of the design process.
A construction software bundle for budget-friendly collaboration
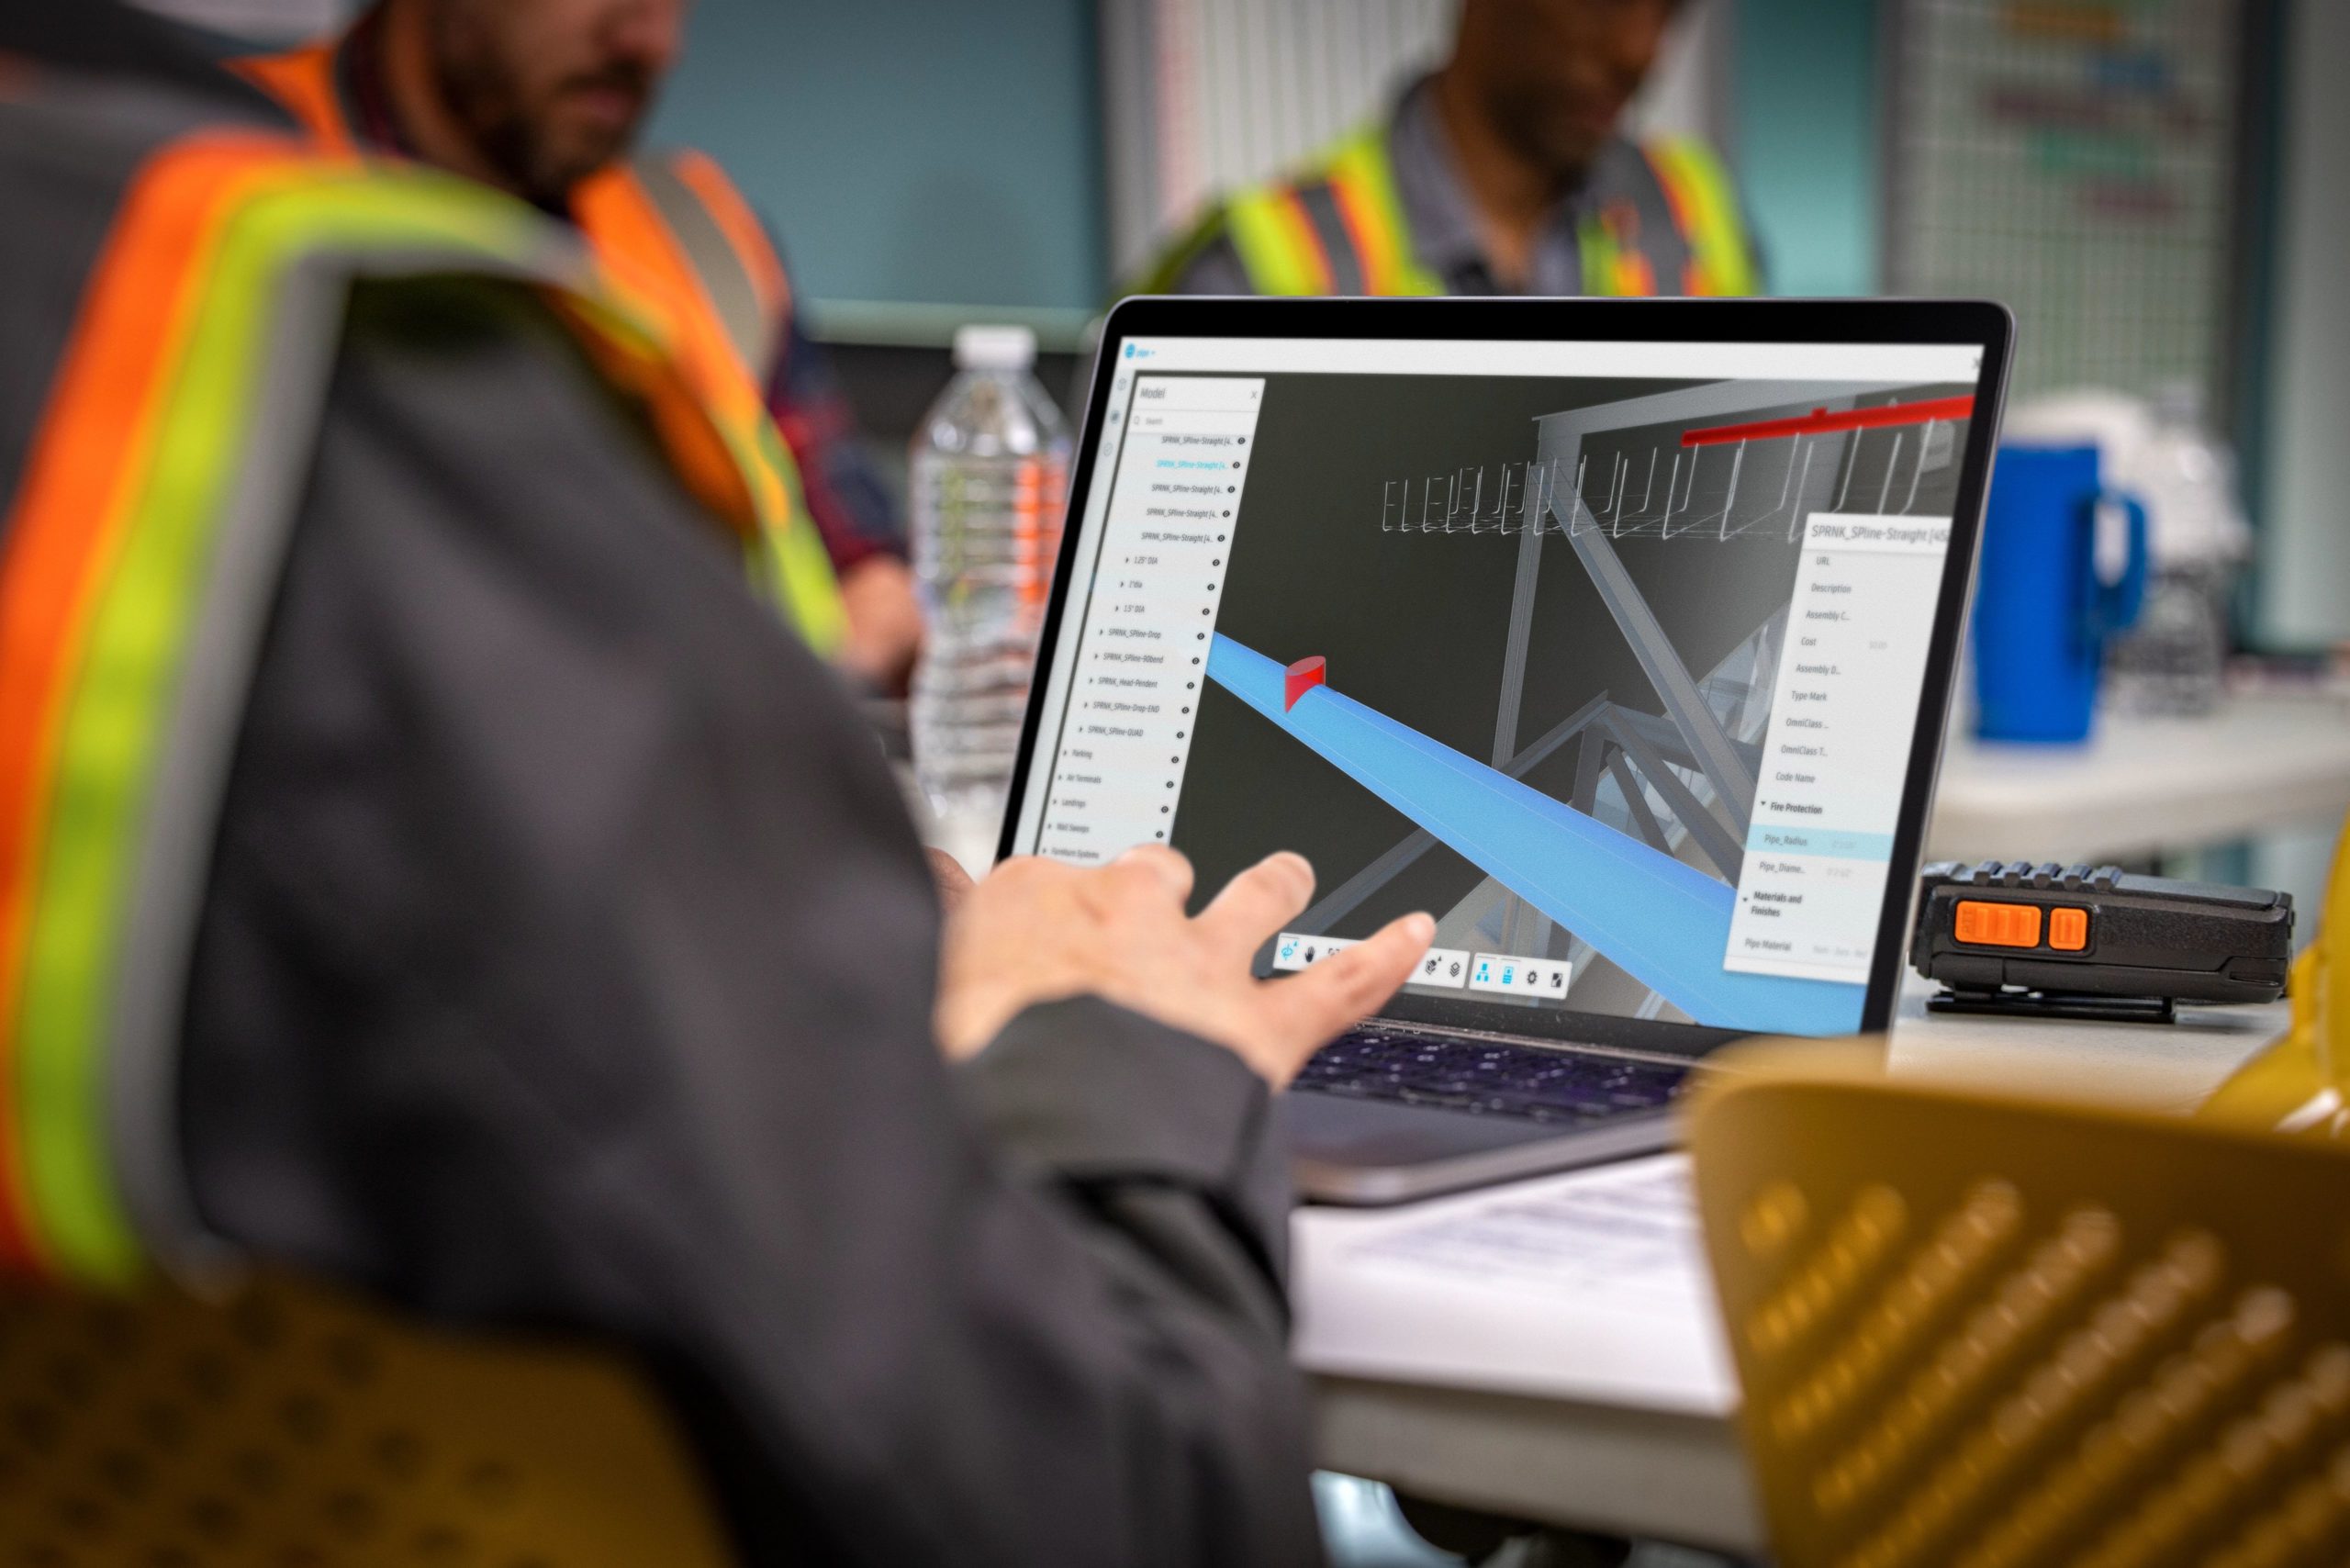
Autodesk Construction Cloud is a series of software that supercharges projects with cloud-based collaboration. This different software saves designers time and money by streamlining the entire construction from bid to build—gone are the days of manually tracking changes and managing model updates.
The industry standard for BIM software
Revit is one of the most commonly used tools in the industry. It specifically offers BIM functionality that can be used by construction professionals, civil engineers, and architects. There are many tutorials and walkthroughs available that make it easy to learn, but there is a bit of a learning curve for people just getting started. However, this is mainly because this tool has everything a professional could ever need—meaning it will take many years to master.
There are also plenty of tools for collaboration, meaning you no longer need to be in the same place to work with other engineers and architects on design projects. Additionally, it offers the same simulation and building management functionality you would expect from traditional parametric CAD modelers. If you could only choose one tool to get, this would be the one needed to manage everything in the building lifecycle.
Cloud-based collaboration between AEC teams across Autodesk products
Autodesk BIM Collaborate Pro focuses on connecting architectural, engineering, and construction teams. This cloud-based platform makes it easier for AEC teams to connect, collaborate, and create high-quality models in real time on a single platform. The main benefit of this software is that team members can implement changes at any time and from any place in AutoCAD Plant 3D, Civil 3D, Revit, and more.
2D and 3D home design tools for remodeling and building
Cad Pro provides high-quality drawing tools for remodeling and building. You can even evaluate your designs quickly using built-in tools. This home design software is made for traditional homeowners looking for a powerful CAD solution to help them build or improve their current homes. It offers features that make drawing, visualizing, and collaborating easy. It is the perfect bridge between a powerful professional system and one that doesn’t have the features needed to do anything useful. Finally, it is also an excellent tool for creating landscapes, patios, and other outdoor designs.
A diverse collection of top AEC software
The Autodesk AEC Collection is designed to tackle all design aspects of projects—from design to construction. It bundles the top programs to ensure that designers, engineers, and construction professionals have cloud-based BIM and CAD tools at their fingertips. This collection includes Revit, AutoCAD, Civil 3D, Navisworks Manage, InfraWorks, and more. Beyond the cloud-based capabilities and robust tool set, a considerable benefit of this collection is that it saves you thousands of dollars compared to buying the included programs separately.
There are plenty of CAD modeling tools and software for design and construction. However, note that there is generally no need to have them all—a few should be enough for most projects. The key is to determine your needs as a designer and the needs of your project.
If you are looking for the best of the best, you won’t go wrong with Autodesk Revit. Then there is AutoCAD, which is excellent for working with everything from basic 2D designs to 3D renderings. However, beginners may find more value in the budget-friendly Rhino3D. Need to enhance collaboration ease? The Autodesk AEC Collection or Autodesk BIM Collaborate Pro are good choices.
With the diverse software available, there is truly an option for every design situation. Do you have any questions? Contact us.
When Autodesk acquired PlanGrid in 2018, it was incorporated into Autodesk Build, which brought together Autodesk’s cloud-based construction software offerings. Autodesk and PlanGrid have developed complementary construction software.
Autodesk Build was launched, bringing together the best of PlanGrid and Build into a single product. Easy to deploy, adopt and use, Autodesk Build unifies best-in-class features from BIM 360 and PlanGrid and adds powerful new capabilities to make information immediately available across the entire construction team.
When your renewal date approaches for your PlanGrid subscription, you now have the choice to renew your subscription with us on the Autodesk Build platform.
We can assist you and your team to transition on the Autodesk Build and the Autodesk Construction Cloud unified platform hub, add and assign users, create a sample project. You can request assistance by contacting us.
Here are some common answers to frequent questions about PlanGrid and Autodesk Build today.
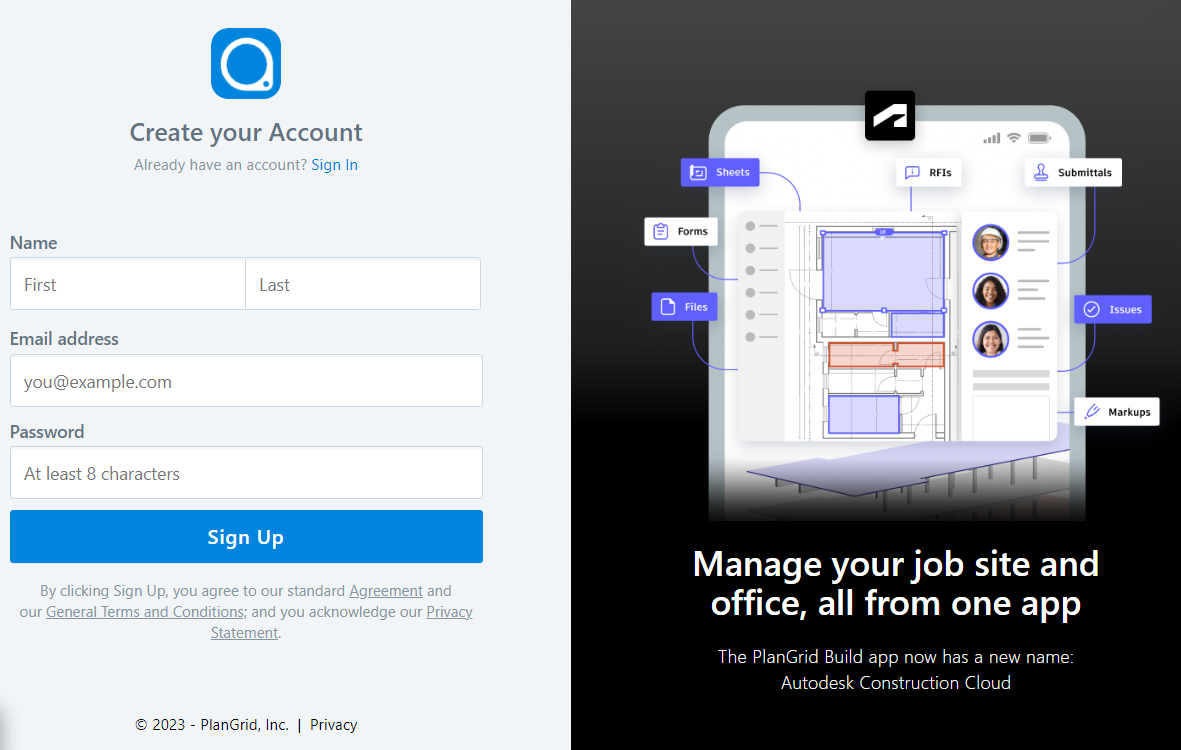
PlanGrid let General Contractors, Subcontractors, and owners benefit from real-time access to project plans, issues, photos, forms, and more. Autodesk Build is the next evolution of PlanGrid that lets construction professionals have all critical project information such as plans, files, issues, photos, forms, assets, RFIs, submittals, meeting minutes, schedules, and much more. Users have mobile access to Autodesk Build through the PlanGrid Build mobile application.
While PlanGrid users can use the side menu to link to photos, sheets, and videos, Build users can link to all of these as well as PCOs, RFIs, assets, forms, submittals, and files. Importing photos in Build also uses AI-assisted automatic tagging for easier file management.
You can access project data from anytime, anywhere, all in one place. With a common data environment, you’ll work with confidence, knowing you’re looking at the most up-to-date information.
You can connect design to construction, from the office to the field. Ensure projects stay on track and improve collaboration all with a mobile-first tool that works wherever you are.
Built on the Autodesk Construction Cloud platform, unified project, and field collaboration software connects data, workflows, and teams to maximize collaboration and drive better business outcomes. As part of Autodesk Construction Cloud, a subscription to Autodesk Build includes and is reinforced by:
Yes, PlanGrid and Autodesk Build are both cloud-based construction management software. With all project information – sheets, files, issues, photos, forms, and much more – in the cloud, project teams have access to all critical information wherever they are.
The PlanGrid Admin Console is for organizational admins. If your username is designated as an Admin Console Admin, you can log in using enterprise.plangrid.com. PlanGrid’s Admin Console lets you manage your organization’s users and licenses from one convenient location. Upgrade and manage user accounts, transfer licenses as needed, and view your available licenses from your organization’s Console.
PlanGrid supports all PDF files. It does not currently support CAD files, but it’s pretty easy to generate PDFs from any file format.
Yes, PlanGrid is available on iOS, and Android. You can access it via the PlanGrid Build mobile application. You can download the app from the iOS and Google Play stores. The app is now named PlanGrid Build.
The PlanGrid desktop app helps get everyone on the same page, across any device—including Windows laptops, desktop computers, and tablets (including Surface). To get started, download the Windows App. Note the app requires Windows 10 or higher.
For help with PlanGrid and to contact our support team, please visit our support site.
We can assist you and your team to transition on the Autodesk Account and the Unified Platform hub, add and assign users, and create a sample project.
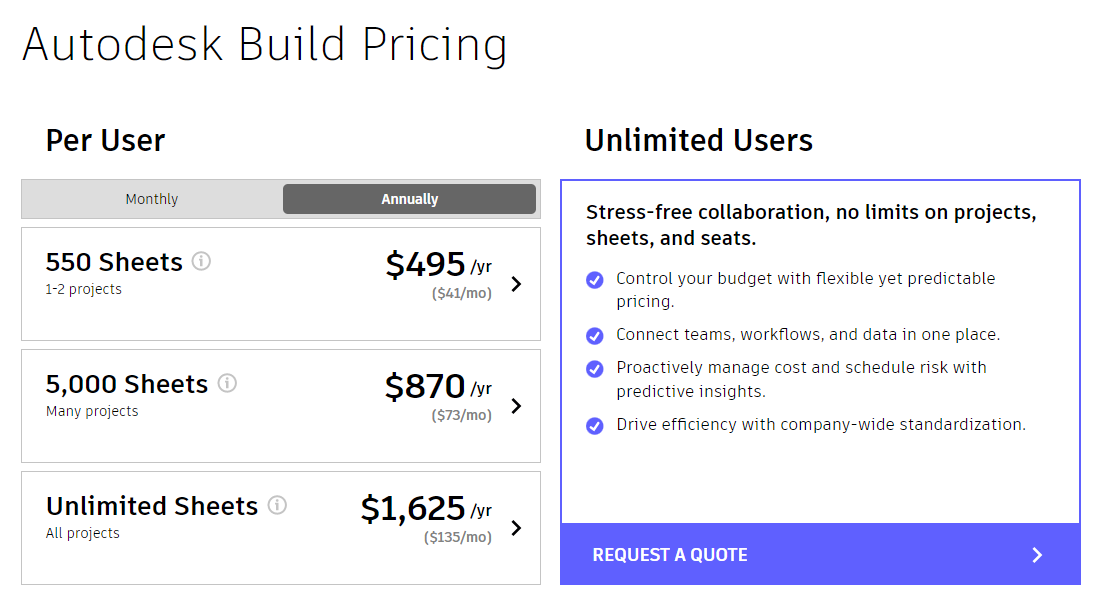
PlanGrid access is now available through Autodesk Build. Subscription and pricing information can be found below. You can also request a quote by contacting us at info@microsolresources.com.
Get in touch with our team to learn more about the benefits of switching from Plangrid to Autodesk Build.

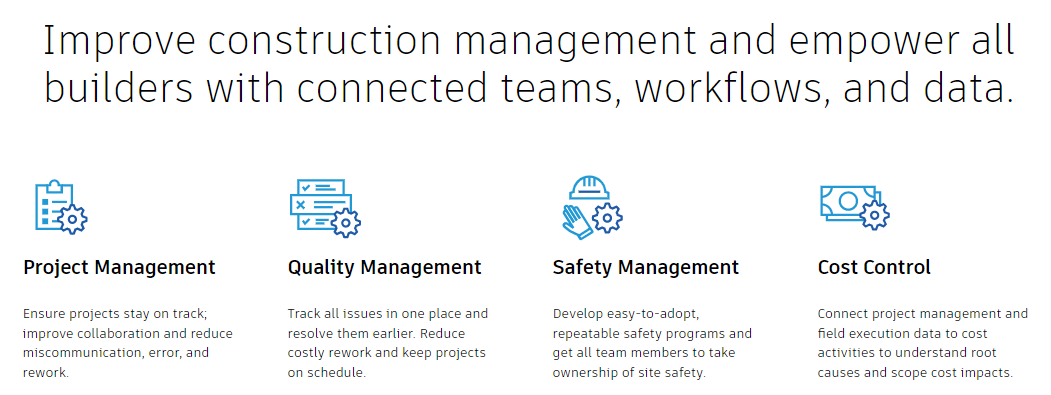
Autodesk Build provides a toolset for managing, sharing, and accessing project documents that result in streamlined workflows between the office, trailer, and jobsite. You can track the quality and safety of the project with issues and forms. Use RFIs, submittals, and meetings to manage the flow of information in the project. You can even track progress as the project evolves.
Autodesk Build also connects to preconstruction workflows in Autodesk BIM 360, BIM Collaborate, BIM Collaborate Pro (Design Collaboration and Model Coordination), and Cost Management for collaborating on designs, coordinating models, and managing costs.
Interested in learning more? Here are Top Things to Know about Autodesk Build.
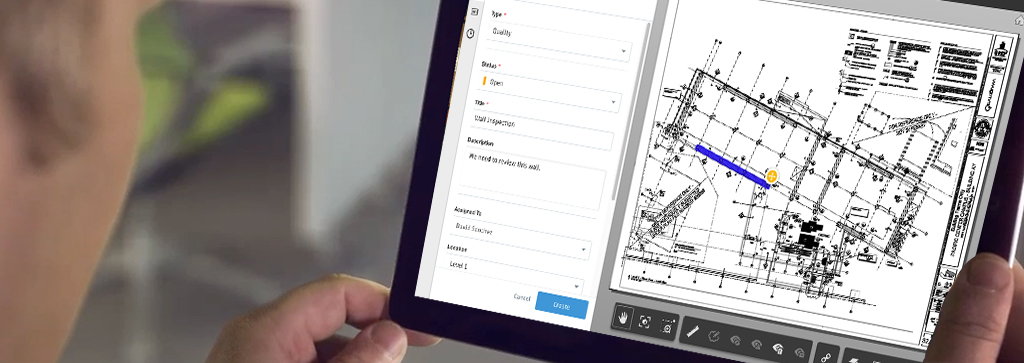
The Issues tools in Autodesk Build allow you to track work across the construction lifecycle and create references to photos, files, RFIs, assets, and more.
Once you configure the Issues tool, your team will be able to create issues quickly and easily from the field. This makes it simple to identify problems, prevent delays, and manage work on your project. With greater visibility and the ability to track progress, you’ll be able to deliver quality work on time.
The Issues tool provides a set of preconfigured categories and types under those categories to organize the issues on your project. You can get started right away or configure the categories and types to your project’s needs.
To configure, customize your issue settings. You can create custom types and categories. Issues have default attributes that you can fill out to provide details on the issue, but custom fields can be added. Adding a root cause can also help to understand how to prevent issues from recurring. You can also manage permissions to issues so that your team has access as needed.
You can create issues within the Issues tool or from markup in the Sheets and Files tools. Once issues have been created, they can be viewed in the Issues log, managed, and exported.
The Forms tool in Autodesk® Build enables your team to fill out, review, and manage project forms. This provides a single secure point to coordinate data collection, photos, and follow-up documents.
Create templates for checklists, daily logs, or other forms for your team, and anyone can complete the forms on-site through our PlanGrid Build a mobile app or at the office on the web.
To help you get started right away, Autodesk® Build comes with a set of preconfigured form templates. However, you can also import templates or create a brand new template. Here is a basic workflow for using the Forms tool:

The Forms tool uses three roles for the forms on your project:
Each role can be assigned in the form templates, and the roles will apply to any form created from that template. See Setting Up Templates for more details.
Contributors can fill out forms individually or in collaboration with others, depending on how the form template was configured.
There are three contributor collaboration modes – single contributor, multiple contributors in sequence, and multiple contributors in parallel.


 Note: This mode is not available for PDF forms.
You will receive an email notifying you with updates about relevant templates and forms in these instances:
Submittals are documents created for approval by the project’s stakeholders. They go through a formal reviewing process.
Submittals are usually: shop drawings, technical data, product specifications, or samples. Submittals group into:
For example, package items for electrical and mechanical components of one system. Submit the package for review. Packages allow reviewers to approve or reject individual items. Note: Only the Submittal Manager can add items to a package.
The PlanGrid Build app allows viewing the general information about submittals, including the Activity log. It’s impossible to modify submittals or view documents in-app.
Project Administrators and Submittal Managers can create and edit Custom Review Workflow for Submittal items. Custom Review Workflow allows:
To create Custom Review Workflow:
 button under Workflow Table
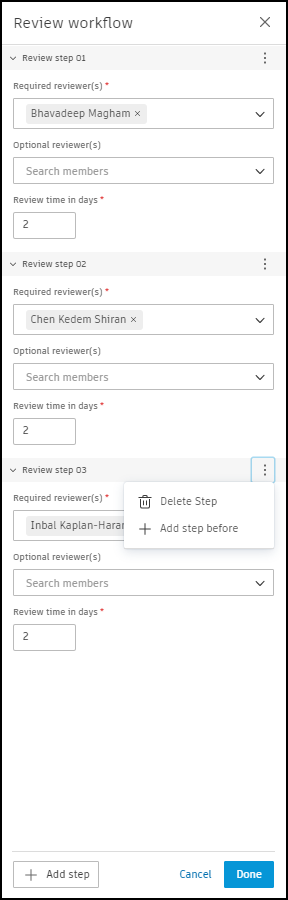
Custom Review Workflow will now be visible on the Workflow bar.

To edit Custom Review Workflow:
 button
Project Administrators assign the Submittal Managers and create custom submittal responses for the project using the Settings menu. Use the blue action button in the workflow bar to progress a submittal to the next person or step back.
Important: Reviewers can edit their response within a review step using the  button in Workflow Table.

Project Administrators and Submittal Managers can create, edit, and delete Custom Review Workflow templates for projects. Custom Review Workflow templates facilitate smooth work with submittals.
To create Custom Review Workflow template:
 > Review templates
 to open Workflow Builder
To apply the template to the submittal item click  and select the template by name. Note: Templates can also be applied when creating submittal items.
1. Responsible Contractor
The primary subcontractor is responsible for submitting the documents or materials for approval.
2. Submittal Manager
The Submittal Manager (typically, General Contractor) is responsible for:
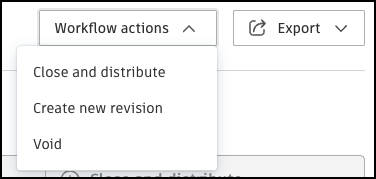
To Close and distribute items:
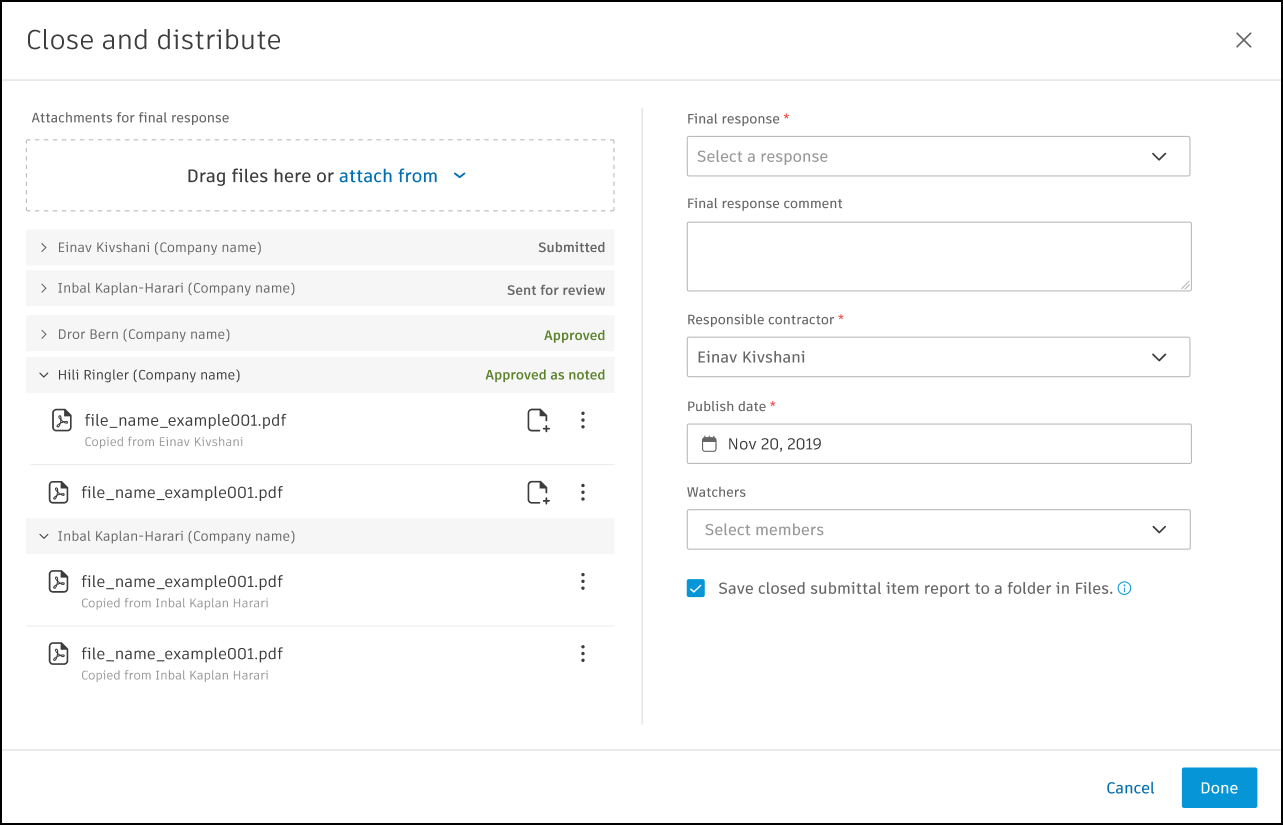
A closed item report can be saved to a folder in the Files tool. This allows for easy access and organization of reports for future reference. Important: When closing and distributing, Submittal Managers need to select attachments that are part of the final response and the final response.
The Final response and attachments appear at the top of the item page. Submittal Managers can be added through the menu. Use members, companies, or roles to add members.
Required Reviewers: The reviewer (typically, the Architect) is responsible for reviewing and approving or rejecting the submittal. Important: Once all required reviewers respond in a given step submittal item moves to the next step.
Optional Reviewers: Engineers and consultants asked for review/feedback. Note: Required and Optional Reviewers can respond and add attachments.
Watchers: Various stakeholders receive notifications on status changes.
Cost Management in Autodesk Build is a robust set of capabilities purpose-built for construction teams, centralizing all cost activities in the cloud. Cost Management helps to improve cost control and streamline workflows. It also provides real-time visibility into cost-related risk, allows for more accurate forecasting, and brings more predictability to cash flow and profitability projections.
In this topic, you’ll learn about:
Interested in learning more? Here are Top Things to Know about Autodesk Build.

Features the latest informative and technical content provided by our industry experts for designers, engineers, and construction firms and facility owners.
LEARN MORESTAY IN TOUCH
