With your subscription to Autodesk AEC industry collection(s), you may have noticed Autodesk has provided each AEC industry collection subscription with an additional product in their lineup: Autodesk Docs.
What is Autodesk Docs?
Autodesk Docs is a cloud-based common data environment that streamlines your document review and management process, as well as approval workflows from design to construction. Autodesk collaboration solutions allow teams to be more connected and productive and Autodesk Docs is a great way to introduce collaboration into your workflow.
It is available in the AEC Collection, as well as is included with subscriptions to Autodesk BIM Collaborate and Autodesk BIM Collaborate Pro, Autodesk Takeoff and Autodesk Build.
The administrators of the Autodesk subscription may have recently received an email from Autodesk announcing that a new product offering, Autodesk Docs, has been automatically added at a 1:1 ratio for each of your Autodesk AEC industry collections.
All active new purchases and renewals of AEC industry collections as of February 9, 2021, are entitled to this Autodesk Docs subscription. Named users are currently receiving notifications, while multi-user licenses should be receiving this notification in April.
What is included in the Autodesk Docs subscription?
Autodesk Docs provides access to the following modules:
Docs
Insight
Account Administration
BIM 360 Document Management
How many seats of Autodesk Docs will current subscribers to the AEC Collection get?
If you have an Autodesk industry collection, expect to receive an email from Autodesk (do.not.reply@autodesk.com) alerting you of your new Autodesk Docs subscription that is now included with each AEC industry collection subscription at a 1:1 ratio.
Remember that all users will need a valid Autodesk Docs subscription. Those who don’t have one will be invited to purchase a subscription or start a trial.
Who uses Autodesk Docs?
Autodesk Docs is used across the project lifecycle by all members of a project team, including architects, designers, engineers, contractors, sub-contractors, drafters, detailers, BIM and VDC managers, project managers, owners, fabricators, and more.
You can learn more about Autodesk Docs and its features by visiting the Autodesk landing page which includes product overview videos and a Frequently Asked Questions section.
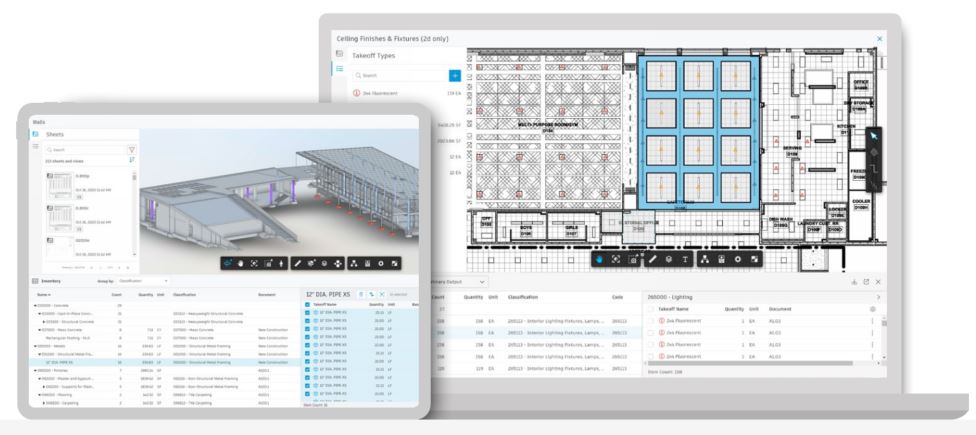
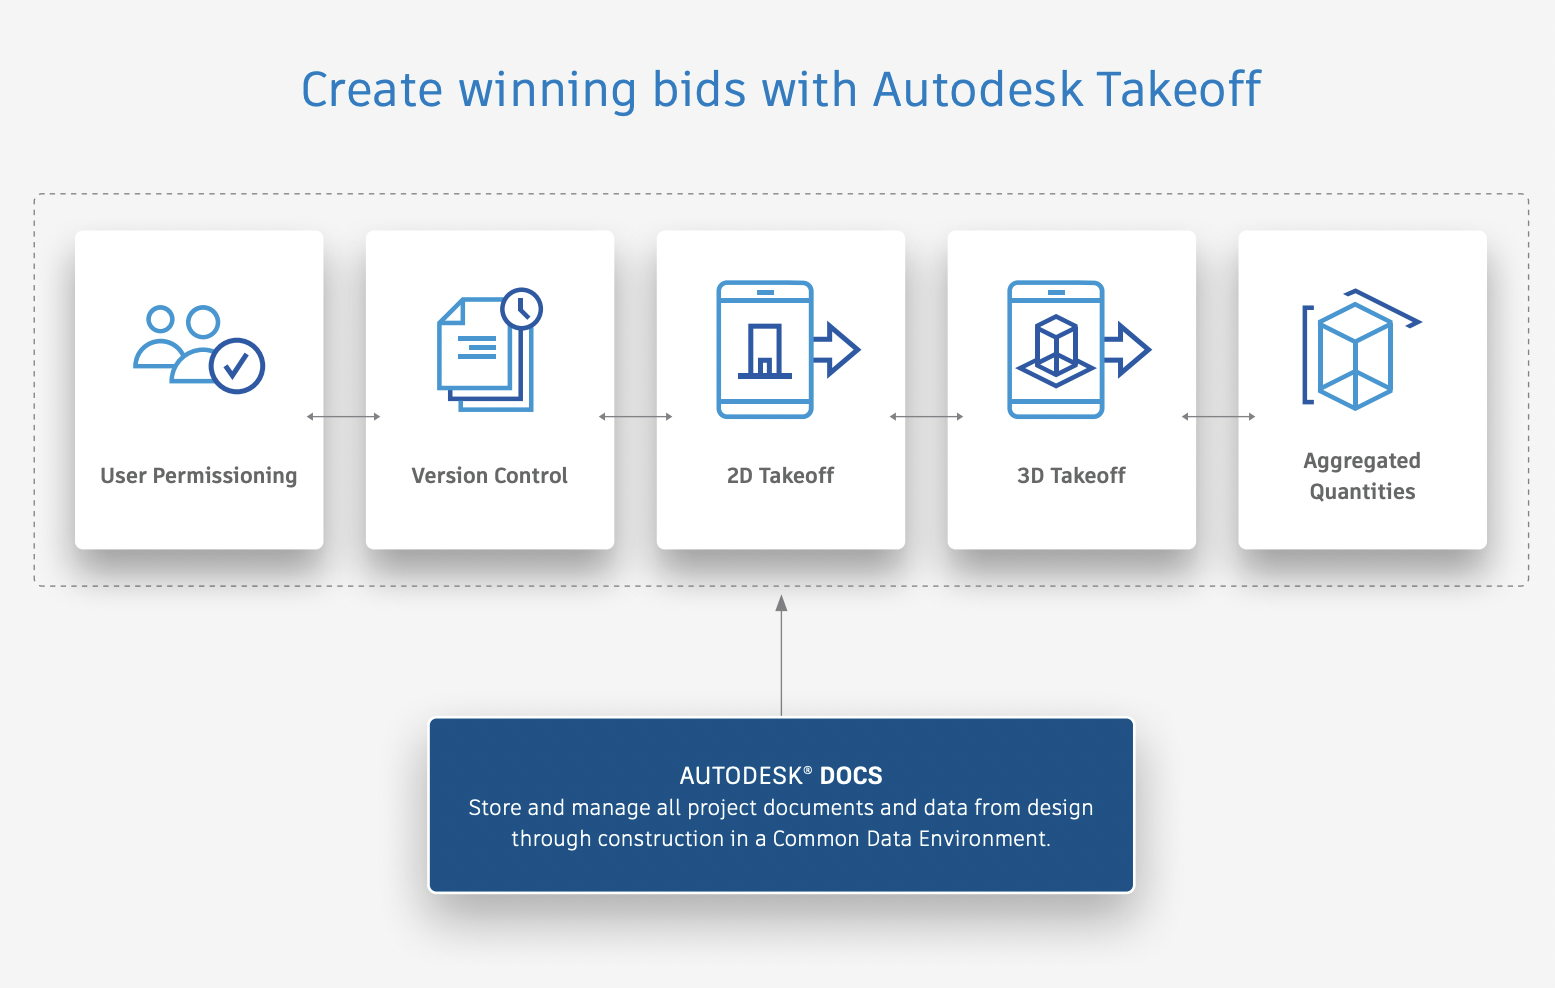
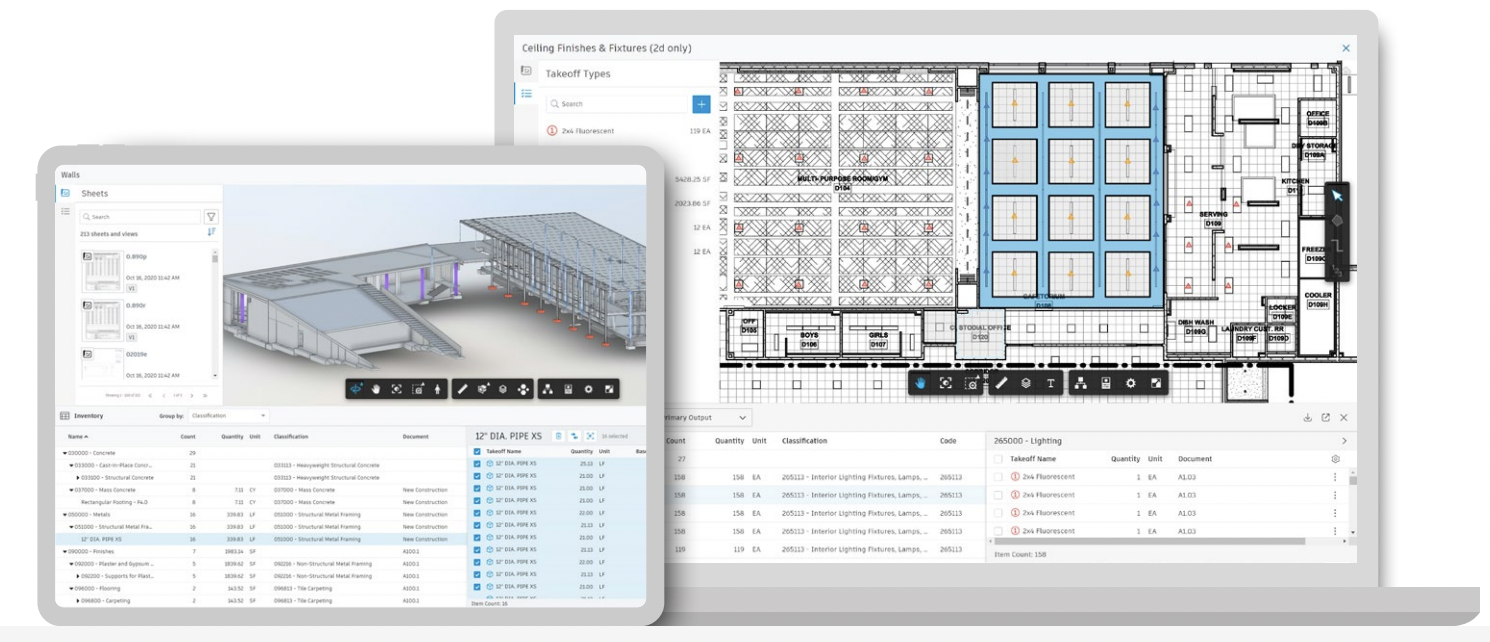
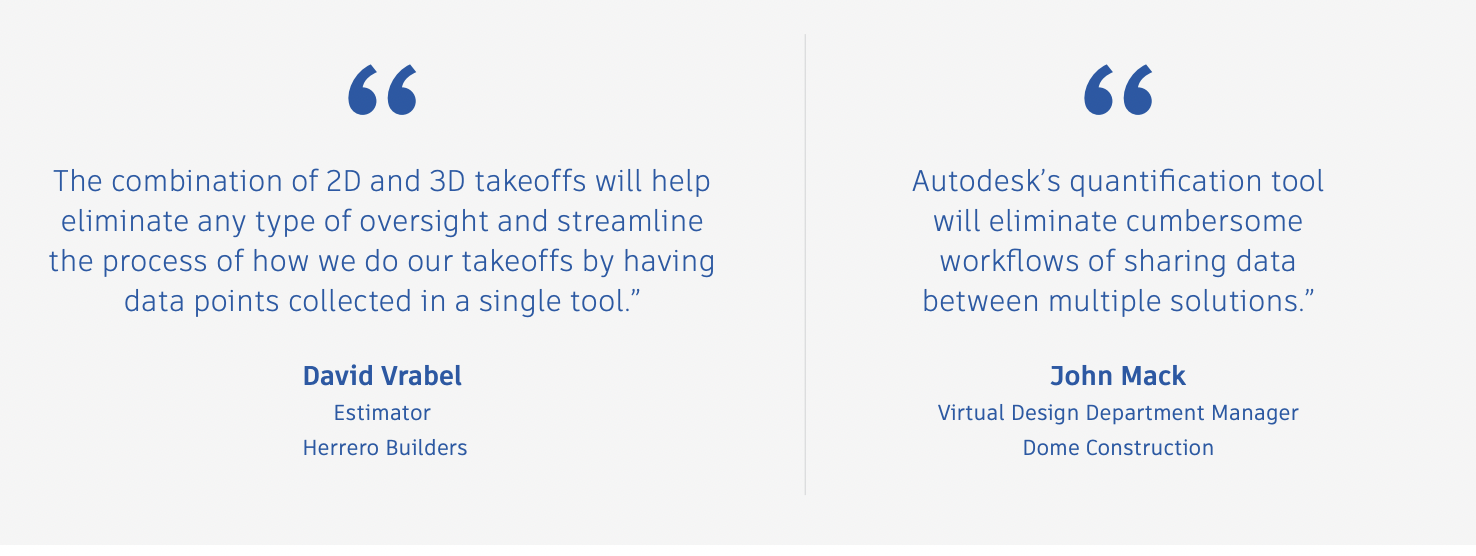
Win more work with integrated 2D + 3D quantification
Autodesk Takeoff is changing the way estimators win more work by combining 2D and 3D takeoff capabilities in a single, online solution. Produce quality estimates for faster, more accurate bidding.
Keep Teams Connected in Real-Time
Align estimators with construction teams with cloud-based data management that ensures everyone is working from a single source of truth. Eliminate oversight by giving the entire team access to the most up-to-date information.
Save Time With Automation
Save time creating competitive bids by performing more accurate 2D takeoffs and generating automated quantities from 3D models. Ensure that the most detailed quantities are captured to ensure the best project scope.
Reduce Risks with Insights
Avoid rework by visualizing project scope in 3D, allowing estimators to better understand design intent and constructability issues. Leverage a single inventory of 2D and 3D quantities throughout the construction process.
Collaborate across your estimating team, projects and business
Centralize document management
Organize, distribute, and share files on a cloud-based, single document management platform, ensuring all team members have access to the same information and latest document set.
Avoid repetitive processes
Perform linear, count or area takeoff with multiple quantities output and use custom formulas to generate complex quantities. Easily move existing takeoff to newer versions of the drawings.
Connect your data
Aggregated 2D+3D quantities can be rolled up by classification, type, and material. Easily export quantities to Excel and connect to your estimating solutions.
Simplify user management
Safeguard your projects with robust user-based permissions. Ensure the right people have access to the right data and tools.
Takeoff with speed and accuracy
Get access to quantities from the model for tremendous time savings and improved project scope visualization.
Improve Collaboration
Autodesk Takeoff breaks down data silos, allowing multiple estimators to collaborate on the same project.
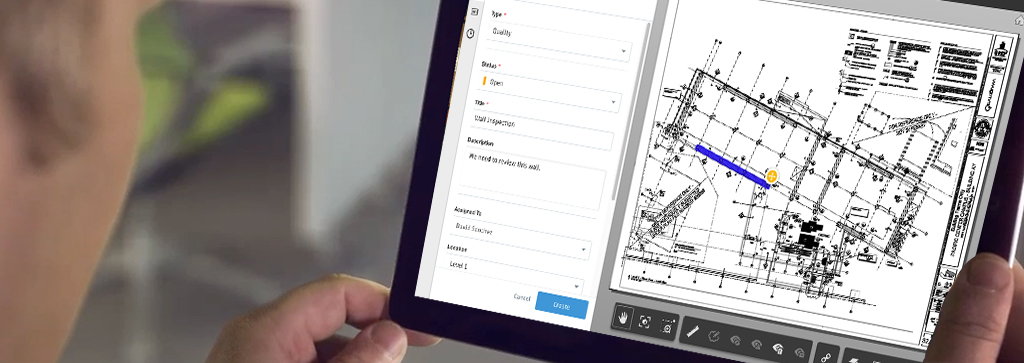
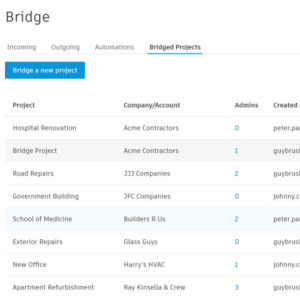
Autodesk launched Bridge, a new collaboration capability that empowers construction teams to share only relevant data with project stakeholders, regardless of whether they are on the same team or building projects within Autodesk Construction Cloud. Bridge gives teams control over their respective project data sets by enabling them to share select sheets, folders, and files with collaborators without having to share all project information. The new collaboration capabilities delivered by Bridge lessen the need for manual data transfer and management and provide confidence that everyone is working from the same information, minimizing rework and saving teams time and money that directly impacts their bottom lines.
“Communicating relevant information with each stakeholder in a timely manner can be a manual and time-consuming process that often leads to data loss and miscommunication, putting us at risk of rework, increased costs, and extended timelines,” said Luis Angel Garcia, BIM specialist, SSOE Group.
“On the other hand, sharing entire projects with team members can compromise privacy and requires tedious permission setting. Autodesk Construction Cloud’s Bridge gives us the flexibility to automatically share relevant information with stakeholders, while still maintaining control over our project data. Bridge radically simplifies our collaboration across teams and projects so we can deliver work on time and within budget.”
“Every construction project is different and our customers need flexibility to collaborate according to the needs of each project,” said Sameer Merchant, vice president of product development, Autodesk Construction Solutions. “Additionally, different stakeholders need to maintain agency of the data pertinent to their work on a project. Bridge introduces a transformational new collaboration capability that gives teams the autonomy and flexibility to manage their own data. Project stakeholders can maintain their own project instances and save on the time, cost, and confusion that often results from having to manage external collaborator permissions and manual ‘send and receive’ workflows.”
Using Bridge to share closed RFIs offers enhanced collaboration by enabling seamless sharing between different Autodesk Build accounts. This capability allows teams to efficiently manage and track Requests for Information (RFIs) even after they are closed, improving project transparency and communication. The closed RFIs can be shared across multiple projects within Autodesk Construction Cloud, streamlining workflows and ensuring all stakeholders remain informed. This can be done by using the Close and distribute function in the RFIs tool.
Bridge connects project data for internal and external teams
Bridge empowers project members with the flexibility they need to share relevant information with different teams and projects using Autodesk Construction Cloud, facilitating smoother collaboration to complete projects on time and within budget.
General Contractors have a simple solution to coordinate work between their trades and provide visibility to owners while ensuring owned project information is documented and saved in a centralized location. Whether they are working on a large project and want to split each component into its own sub-project or want to break out projects for trades to meet privacy mandates set by owners, general contractors can now use Bridge to share data with different teams and projects from one main, easy-to-manage instance.
Specialty trades can share necessary information such as project install progress with general contractors while maintaining their respective data within their own project instances. If they have multiple ongoing projects, trade teams can also aggregate their data into one main, easy-to-manage internal location for an aggregate view that strengthens analytics and future decision making.
Owners have clear visibility into project performance and construction documentation when they link data using Bridge. Information is not lost in manual “send and receive” workflows and the data needed to make timely project decisions becomes easier to find.
Designers can communicate the latest design documents with owners and contractors and keep a pulse on how design intent is being upheld during construction. Bridge enables designers to protect intellectual property and share only necessary sheets and files while also reducing time spent on manual “send and receive” workflows.
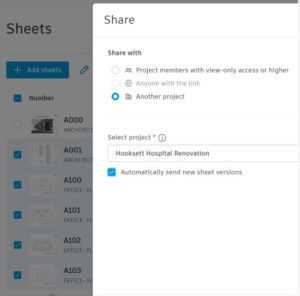
Share sheets and files.
With the right permissions, easily select any Sheets or Files to share with another project within the same account, or to a project within a different account.
Set up automations.
Ensure all teams have the most up-to-date versions by setting up and managing automated sheet sharing.
Create direct project linking.
Take information sharing to the next level by connecting stakeholders across accounts, providing contact details for collaborators, and making disconnecting and removing automation at the end of a project a one-click process.
Bridge is now available at no additional cost to customers using Autodesk Construction Cloud’s web applications — Build, Collaborate & Takeoff.
Features the latest informative and technical content provided by our industry experts for designers, engineers, and construction firms and facility owners.