Discover What’s New in Autodesk: Stay Ahead with Microsol Resources
Are you curious about the latest Autodesk features and how they can enhance your workflow? Wondering how Building Information Modeling (BIM) can drive efficiency and innovation in your projects?
At Microsol Resources, we make it easy for you to stay up to date with the latest advancements through our annual What’s New with Autodesk webinar series. These sessions dive deep into the newest features across Autodesk’s suite of tools—including AutoCAD, Revit, Autodesk Construction Cloud, Civil 3D, 3ds Max, and more—so you can maximize productivity, improve collaboration, and integrate cutting-edge BIM workflows seamlessly.
Why Tune In?
With every new release, Autodesk introduces powerful enhancements designed to optimize workflows, boost efficiency, and enhance project collaboration. Our webinars go beyond just listing new features—we focus on practical applications, expert insights, and real-world tips to help you get the most out of the latest software updates.
Key Takeaways from Our Webinar Series
Time-Saving Enhancements — Work faster and smarter with new automation tools and performance improvements.
Improved Collaboration — Explore features that streamline teamwork across disciplines, from architects to engineers and contractors.
Advanced BIM Integration —See how the latest tools support seamless data sharing and coordination in complex projects.
Watch Our Past Webinar Series
Missed a session? Explore our archive of What’s New with Autodeskwebinar series and see how Autodesk has evolved over the years:
Microsol Resources will bring you the latest information on Autodesk products so be sure always to follow our website, blog, and social networks to stay up to date.
Stay ahead of the curve and see the demos of the new features with our building and infrastructure specialists.
Model corruption in Revit can happen. We noticed a common trend about what causes these issues and have compiled possible solutions to implement into your project or firm’s workflow, to reduce the risk of corruption and down-time. In another article we’ve discussed, What Causes Revit Data Corruption? In this article, we will focus on one of the worst instances of model corruption.
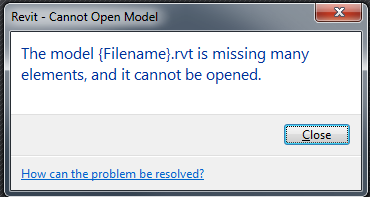
“The model {filename}.rvt is missing many elements, and cannot be opened.”
This error indicates corruption in Arch, Struct, or MEP Revit families, where the application does not allow anyone to open the project file. This can affect both projects using or not using Worksets and Worksharing. This message appears when there are more missing elements than Revit will ignore. If there are just a few missing elements, Revit ignores them and attempts to continue opening the model. If there are too many missing elements, the file is unrecoverable and the team will have to restore a previous version of the file or a local file.
There are instances where the Microsol Resources support team can open a case with Autodesk and have the file repaired. Sadly, this does not happen often.
However, sometimes the error only occurs when the ‘audit’ option is checked when opening the file. We will proceed with the understanding that we are able to open the model and that the error appears when ‘Audit’ is checked.
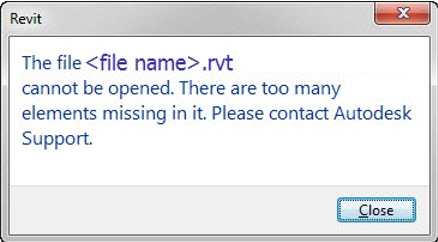
The following are two images of the error message we’ve seen.
Old Message
Revit Error & Possible Causes
Elements in your project are corrupt, causing Revit to report the missing elements. Here is our tutorial on troubleshooting.
Collect backup files for your local and detached central.
Identify the elements. In the Revit Journalfor this session, it is common that the families causing the issue can be identified.
The element corruption may exist in a linked RVT. If the linked file has many missing elements and the link cannot be loaded, Revit may present the missing elements warning.
One user is running a different build of Revit. They have not installed the same updates that the rest of the team is using.
Packet Loss A communication interruption between the local file and the central file. Most likely due to poor internet or network connection.
Too many warnings Try to minimize warnings to the best of your ability, especially the following warnings:
Any error that indicates a problem that will affect area or volume calculation. Volume requires much more calculation than area.
Highlighted walls are attached to, but miss, the highlighted targets
Highlighted elements are joined but do not intersect
Area or Room separation line is slightly off-axis and may cause inaccuracies
Highlighted lines overlap. Lines may not form closed loops and it’s variations
Stair errors.
Duplicate and Overlapping Elements.
Upgrading an old model/family Up until Revit 2016, there were certain elements that ended up getting their IDs changed in 2017. Things like fonts and stairs/railings, in particular, got changed and caused a lot of issues.
Replace the missing elements from a backup or stable file.
Export Families using Save as / Save as Family / Save as Library
Import families that illustrate errors during the Save as Library process.
Find a user with a working local copy, or the most recent backup without the error, and move forward with the recovered model.
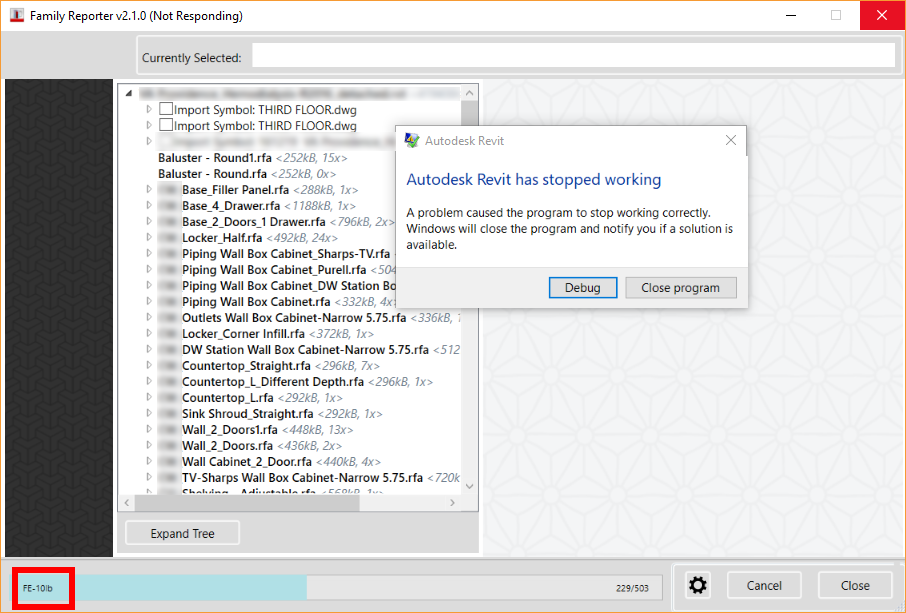
The premise is that this error is caused by one or more corrupt family components. So the solution is to extract all families from an un-corrupted archive of the model (un-corrupted here means that one is able to open the model with an ‘Audit’ check) and load those families into the corrupted version of the model. This overwrites all family definitions including corrupted versions and thus rids the project of the error. Family extraction from a project can be automated by going to Save As > Library > Family. We need to find a stable family or repair the issues identified in this warning.
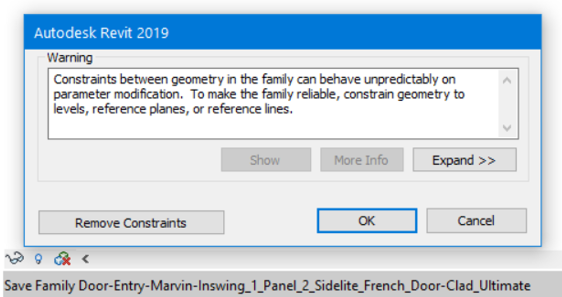
The image below was captured during this process, a warning pops up indicating the family is problematic in some way. I moved the warning error box to the lower left of the Revit interface, in order to see and capture the warning next to the status bar. This information and the right Revit journal file can help identify potential problems in the family being exported.
The warning dialog has an option to export the warning, the element ID, and the addressable issue.
However, the challenge with this approach is that large projects contain hundreds of families, and loading them manually becomes tedious. We can automate the process either by using a macro or a dynamo script. Reach out if this is something your team needs.
Once the corrupt family has been identified, one can re-open the model and locate the family in the Project Browser and delete the family (via right-click), or replace the family with an un-corrupted version from the library or archive.
The project should open without error after this (when ‘Audit’ is checked). If there is more than one corrupt family, this process will have to repeat as many times as needed since each run of the Family Size Reporter will crash when processing the first available corrupt family.
Missing Elements Hosted on BIM 360
If the missing elements message is received for a Cloud Workshared model hosted on BIM 360, then the process would be the same (restore a previous version of the model and replace any family corruption). However, the corruption could be isolated to the locally cached copy of a model or link, particularly if the issue is limited to just one user. In this circumstance, the solution is far simpler:
To clear a corrupt/damaged cloud workshared model or outdated link from the system:
Create a folder called Cache on the Desktop.
Move the PacCache and CollaborationCache folders to the folder created on the desktop.
Note: This will recreate the cache and clear any corrupt/damaged cloud workshared cache data.
Open the Desktop folders from Step 2 and the original folder location of the Cache files.
Move the files that were not recreated back into the original Cache folders.
Note: If none of the files are moved back into the original cache folders, the cache for other projects will need to be recreated which will slow down the initial time it takes to open the file.
An alternate approach, if you have access to a second system:
On the second system, open Revit.
Sign in to your own A360 account.
Open the problematic model.
Copy the newly created CollaborationCache files from the second system to the original system (overwriting).
If the method above does not work, then the more complete Alternate Sledgehammer Approach may help.
With Revit closed, rename the CollaborationCache folder.
Note: This will force all model data to be re-cached. If the model can open, then it confirms that the locally cached copy was corrupt. If the issue persists, then the cloud model has become corrupt and will need to be rolled back to a previous version.
Preventative Care
For all Revit projects, Microsol Resources and Autodesk, inc recommended regularly open and audit your Revit model (daily, or weekly) to ensure that any damage or corruption is addressed as soon as possible. It is also important to address warnings to reduce the overall risk of model corruption. Please see our other blog, Revit Project Maintenance Guidelines. Consider taking a class with us, perhaps Revit Family Creation, Online
Extra Help from Microsol Resources
If you are still having persistent issues, you can create a support case and our Technical Team will try and assist you.
The first step of any Revit Model Maintenance process is Detach from Central with Audit. However, there is more to cleaning a project than this. This article is a cumulation of thousands of tech support cases, solved and logged in our CRM system.
When a model is not maintained, it takes more system resources, performance is reduced, packets of information lost and corruption in the data is the result. I’ve organized them in the best order possible, but it takes a team to get it all done, while in production.
Here are our recommended procedures for a terrestrial and cloud project.
Sync with Central
Close all local and central files
Detach from Central
Check the Revit Journal
Purge Unused
Export Families to review and audit
Check Worksets
Review and address Warnings
Delete Backup and Temp Folders
Create a new Central Model
Create new Local files
Have all users Sync with Central, SWC, and relinquish all borrowed or owned worksets.
Tip: I believe no one should own a workset, only borrow from them.
Close all Local Files. In the BIM 360 world, we have no local files, other than the local cache in APPDATA
The BIM Manager will open the Central model, by selecting “Detach from Central” along with “Audit”. In BIM 360 we can select the project we want to open on the Revit Home page. choose “Open and Audit” at the ellipsis, ” . . . “.
When the BIM manager works in the Central Model. No one should attempt to open or create a new local.
All work is stopped at this point.
Check the Revit Journal.
Journal review can help determine corruption, We can use the Journal to check the Revit build version, locate errors, and even identify bad work habits.
I will create a separate blog for this.
The BIM Manager should use the “Purge All Unused” tool.
Why not create seed projects that the team can open, browse and copy elements from?
Export Families to review and audit. Use “Save As / Library / Family”. This tool will add all the families from the project to the folder you select. Careful, this could take a while. Don’t drop them on your or your client’s desktop. ;-). Note any warnings and the family name if any errors occur. The warning will pop up and interrupt the Save As process. The Status Bar will have the name of the Family, Revit is exporting.
Check that the worksets are being utilized properly.
I create a 3D view for each workset in the project. I then isolate the workset in each view. This allows me to review the project and ensure elements are on the right Workset.
I’ve seen elements on the Shared Level and Grid workset. How did that happen?
Be sure to create worksets for links and to utilize the opportunity to close worksets when creating new locals.
I recommend we use worksets to allow a local user to close the worksets they do not need to be loaded in their local file. Experience has proven this is an enormous opportunity to increase project performance.
Check and resolve all Warnings.
Easier said than done. It’s best to address every warning as it happens. This should be an ongoing effort from the start of any project.
Microsol Resources offers a Revit Model Health Check service. Contact me for more info.
At this point the Backup and Revit Temp folders related to the Central Model are useless at this point, they should be deleted.
.slog file, Worksharing Log File, is part of the _backup folder for the central model. It is found inside the folder Central_File_backup where the Central_File.rvt is located. This file contains information on the Sync with central progress, element borrowing, and users accessing the central file.
An example of a permission issue is when someone can’t edit the element because it is being edited by another user, but this user is not currently in the model.
The Revit SLOG file could be corrupt and will be re-created after performing these maintenance steps.
The backup folder is useful only when the project is in production and the team wants to Roll Back the project to a previous date, indication in the project history.
BIM 360 does not have a .slog file.
Once the backup and Revit folders are deleted the BIM Manager can create a new Central Model by performing a save-as and choosing “Make this a Central Model after save” in the options dialog with “Compact Central” checked. While in this dialog always ensure the following
Indicate the “Maximum” number of backups. 20 is the default. These backups are usable when the team chooses to Roll Back the project. Not my first choice.
Choose the option of “Specify” under the section called “Open Workset Default” This gives each local user the option to close worksets when creating their new local file.
When we close DWG Links worksets we see an enormous performance benefit.
Choose a simple drafting view, “Bulletin Board” as the source for the “Thumbnail Preview” section.
Lazy parsing plays a role in this performance gain.
“Lazy parsing” means that the data for each element isn’t converted until it is actually needed. The main uses for the data in an element are to display that element or to regenerate it when there are changes to other elements it depends on. Thanks to Irwin Jungreis and their forum contributions
All users can now Create new Local files.
BIM 360 Model Maintenance
When a project in the cloud, in BIM 360, is seeing signs of possible corruption we should use the same maintenance procedures on these files as well. First, one would need to take it down, or copy the RVT to a local computer and preform these maintenance procedures. But we shouldn’t just copy and paste.
There are many instances of the model in the BIM 360 project. We have the version we open and edit while using Revit. We have the published version in BIM 360 Document Management, which is viewable when using the browser via docs.b360.autodesk.com. We even have copies of the file in various shared folders or even within coordination spaces.
Because it is sometimes difficult to determine what has been published most recently and what sets are included. It is our recommendation to open the RVT via Revit. Open your model, Sync with Central, and Relinquish all editable items. use the “Save As” function to save a copy of the file to your desktop or the local machine. Make sure you check the options in the File Save As dialog, choose “make this a central file after save”. Perform maintenance starting from step #3 above.
Let me know your thoughts on this process. You may have another tip I can add to this resource.
Features the latest informative and technical content provided by our industry experts for designers, engineers, and construction firms and facility owners.