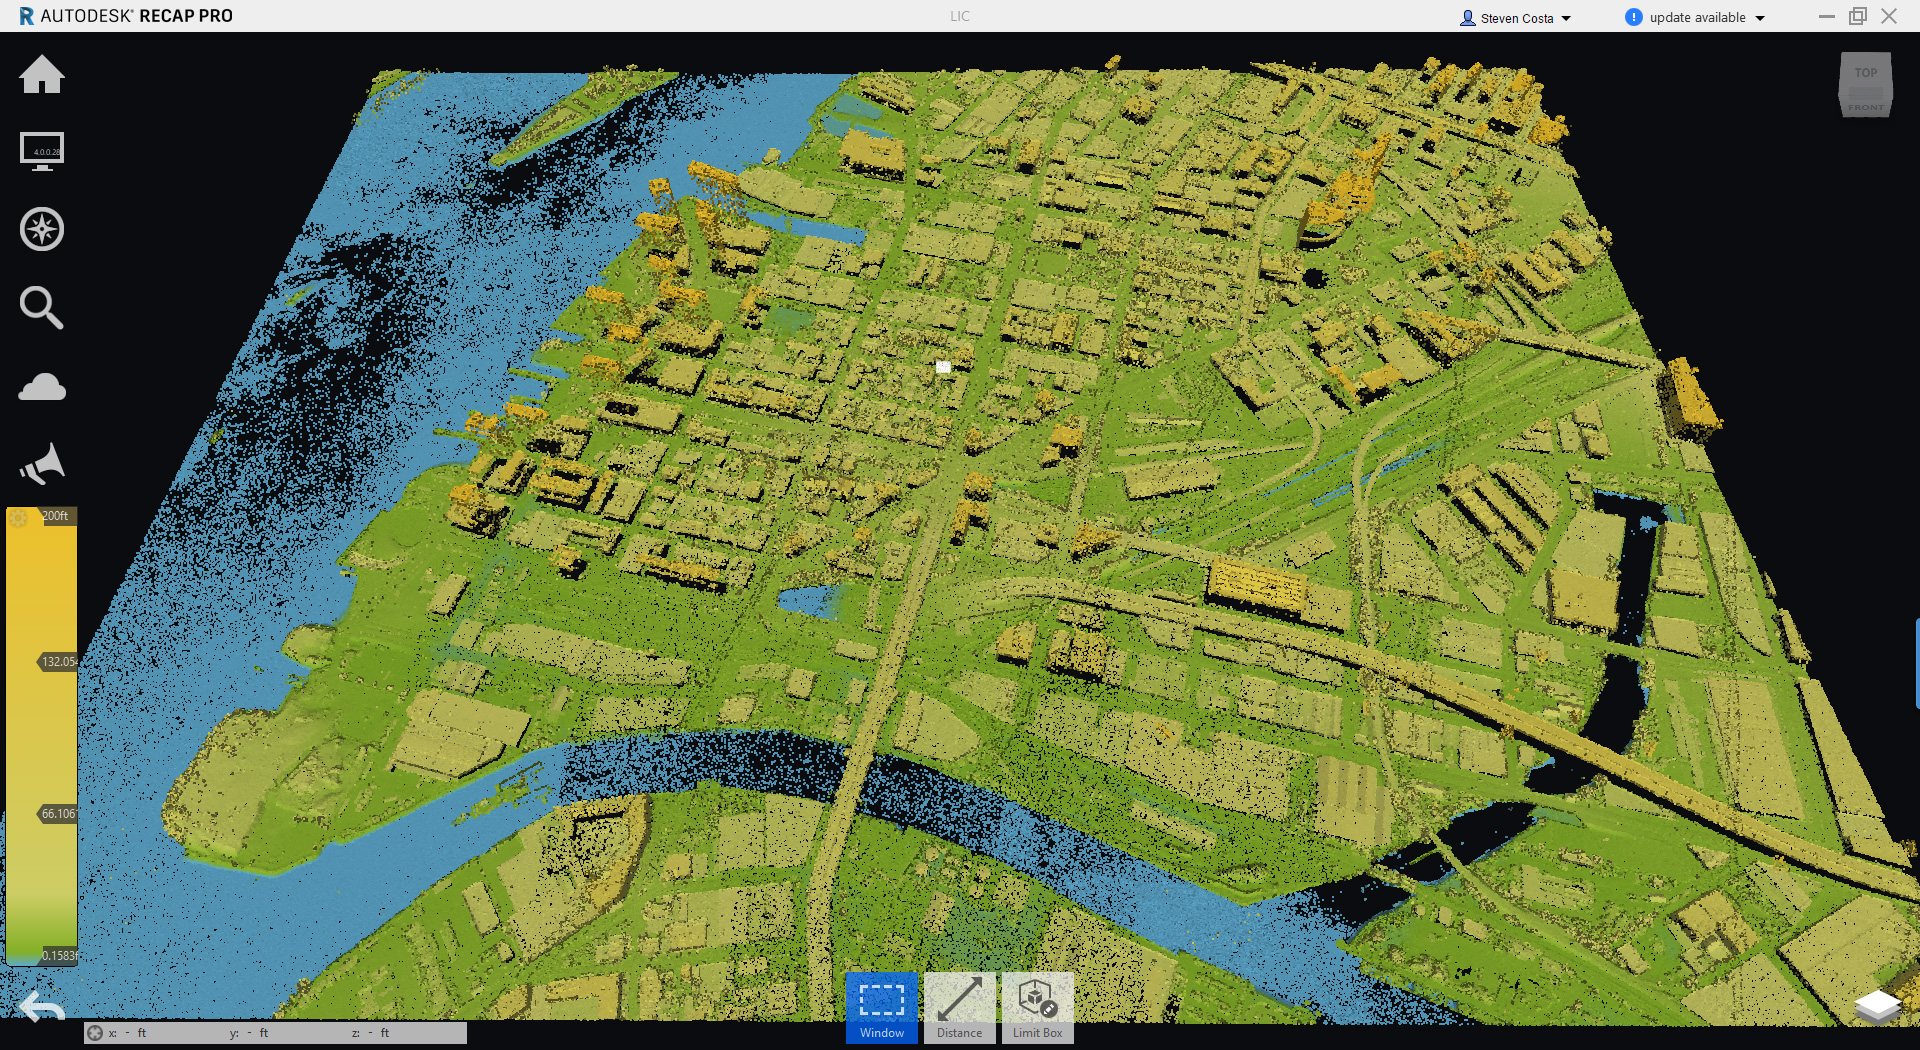
Explore how to use reality capture and scanning to convert reality into a 3D model or 2D drawing that’s ready for further design, so you can start your design with accurate dimensions and full photo-quality context rather than a blank screen.
Learn about how LANGAN uses their surveying data for a variety of applications; from site visualizations and mass models to BIM support and forensic studies, as well as how to:
Use automatic registration in order to create an accurate, scalable 3D point cloud from your scan data in minutes.
Use ReCap to import, view, and edit point clouds to prepare them for other Autodesk products.
Add notes, measurements, pictures, and hyperlinks to your project, and share with collaborators
Review our webinar with Joseph Romano and Matthew Sipple from LANGAN Engineering as they discuss the use of reality capture to experience the increased speed and workflow capabilities for scan and photogrammetry projects.
With Autodesk ReCap software you are able to create accurate 3D models with reality capture using laser scanning. This software, which lets you convert reality into a 3D model or 2D drawing, actually comes in two flavors: ReCap and ReCap Pro. This blog post is here to explain the differences between the two.
To access ReCap, you can start a free 30-day trial. Once those 30 days are up, you will have the option to subscribe to ReCap Pro or continue using the free features of ReCap. Check out the comparison matrix below to review the different features!
Microsol Resources welcomes our latest guest blogger, Peter Fried from the Dept. of Applied Physics, NYU Tandon School of Engineering
Peter contacted us with interest in our ProJet 660 Full color CJP 3D Printer from 3D Systems. This printer was able to bring Peter’s digital captures to life.
Peter Fried, Dept. of Applied Physics, NYU Tandon School of Engineering David Brown, Johnson Museum of Art, Cornell University Drew Harvell, Dept. of Ecology and Evolutionary Biology, Cornell University
More and more 3D imaging is being used for archival recording of collections of artistic, historical and natural specimens. This has only become possible through the rapid improvements in scanners, cameras, software and graphics processors that now enable 3D capture of subtle details, shadings and textures.
Many of the specimens in such collections are in storage and unavailable to the public. 3D imaging, with its vivid appearance and viewer interaction, can vastly increase the audience for these “buried treasures.” In addition, 3D imaging also provides archival recording and a valuable tool for research access. Recent articles have described 3D recording projects at the Smithsonian (http://3d.si.edu) and at the Natural History Museum in Berlin (Mallison et al.).
However, making 3D images faithful to the original still has challenges for many specimens. Fine detail or lack of detail, hidden surfaces, glossy surfaces, and transparent or semi-transparent volumes are a few of the challenge areas.
We have begun to make 3D images of a collection of small and beautiful glass figures that will test the capabilities of 3D imaging. These figures are sculptures of marine invertebrates made over 100 years ago by the father-and-son glassblowers Rudolf and Leopold Blaschka. The collection is at the Corning Glass Museum and at Cornell University (http://blaschkagallery.mannlib.cornell.edu ) where Professor Drew Harvell is the curator. The collection was recently featured in an award-winning film, Fragile Legacy (http://fragilelegacy.info),
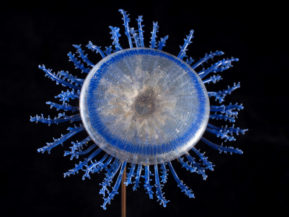
Figure 1. – Blaschka – 560
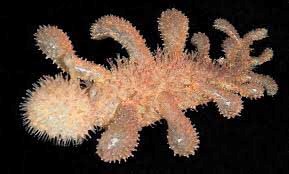
Figures 1-3 show some of the more than 500 glass figures in the collection. They illustrate the gamut of detail and transparency in the collection. We have begun our efforts with the simpler, relatively opaque glass models (e.g. Figure 1). Imaging the beautifully detailed transparent jellyfish (Figure 3) is a challenge for the future.
Figure 2. Blaschka-460Figure 3. Blaschka – 216
To image the 2.5-inch squid shown in Figure 1, we are using photogrammetry of DSLR images. The photographs were made by David Brown, the museum photographer at Cornell’s Johnson Museum and producer of the film mentioned earlier. The software is AgiSoft PhotoScan and some finishing touches were added in Blender. The processing was done on a Dell M4800 with a Quadro 2100 GPU. The PhotoScan software works well and has an excellent user interface that allows separate user controls for each of several processing steps. Autodesk Memento seems promising, but is currently still in beta until summer of 2016.
Positioning the model. The model was placed on a turntable and photographs were made at turntable intervals of 2-10 degrees. This process was repeated at several angles of elevation and for several orientations of the model.. Inter-photo alignment can be done with benchmarks placed next to the figure. However, when the model is placed in different positions on the turntable, benchmarks cannot be used. All the photos were masked both (a) to remove background detail, which would confuse the alignment, and (b) to reduce processing time, which can run up to several hours.
Lighting. The photogrammetry requires uniform lighting, a minimum of shadows that change positions between photos, and a minimum of specular reflections from the model’s glossy surface. The photos were all done in a soft-light tent. De-glossing the model with spray or powder coatings was impossible due to the sensitivity of materials in the models. Polarization can be used to control reflections but was not necessary in this case. This helped maximize the light on the subject, which was necessary to use small apertures for maximum depth of field.
Detail and hidden surfaces. We made many photos and numerous processing runs to get the right photos to capture the detail of the squid. The photos must provide (a) all the necessary viewing angles, and also (b) a precise framework for inter-photo alignment. The final model uses about 200 10MB photos.
Post-processing. Some details of the transparent sections were not rendered exactly by the photogrammetry. For these we used Blender to smooth out the two glassy tentacles and refine the shape of the suckers. With such “artistic” intervention, care must be taken to be as faithful to the original as possible.
A 3D image of our first model can be seen at https://p3d.in/zuD9C/shadeless (rendered in Figure 4). The results show the capabilities of 3D imaging to capture detail and surface texture in delicate subjects. We look forward to imaging more of the Blaschka collection as well as items in other collections.
Figure 4. Rendering of the Photogrammetry-Generated Model of Blaschka-560
———————————————————————–
Mallison, H., Vogel, J. & Belvedere, M. (eds.) 2014. Digital Specimen 2014 – Abstracts of Presentations. Museum für Naturkunde Berlin. http://www.naturkundemuseum- berlin.de/forschung/tagungen/digitalspecimen-berlin-2014/home/abstracts-of-presentations/
Features the latest informative and technical content provided by our industry experts for designers, engineers, and construction firms and facility owners.