Microsol Resources welcomes our latest guest blogger, Peter Fried from the Dept. of Applied Physics, NYU Tandon School of Engineering
Peter contacted us with interest in our ProJet 660 Full color CJP 3D Printer from 3D Systems. This printer was able to bring Peter’s digital captures to life.
Peter Fried, Dept. of Applied Physics, NYU Tandon School of Engineering David Brown, Johnson Museum of Art, Cornell University Drew Harvell, Dept. of Ecology and Evolutionary Biology, Cornell University
More and more 3D imaging is being used for archival recording of collections of artistic, historical and natural specimens. This has only become possible through the rapid improvements in scanners, cameras, software and graphics processors that now enable 3D capture of subtle details, shadings and textures.
Many of the specimens in such collections are in storage and unavailable to the public. 3D imaging, with its vivid appearance and viewer interaction, can vastly increase the audience for these “buried treasures.” In addition, 3D imaging also provides archival recording and a valuable tool for research access. Recent articles have described 3D recording projects at the Smithsonian (http://3d.si.edu) and at the Natural History Museum in Berlin (Mallison et al.).
However, making 3D images faithful to the original still has challenges for many specimens. Fine detail or lack of detail, hidden surfaces, glossy surfaces, and transparent or semi-transparent volumes are a few of the challenge areas.
We have begun to make 3D images of a collection of small and beautiful glass figures that will test the capabilities of 3D imaging. These figures are sculptures of marine invertebrates made over 100 years ago by the father-and-son glassblowers Rudolf and Leopold Blaschka. The collection is at the Corning Glass Museum and at Cornell University (http://blaschkagallery.mannlib.cornell.edu ) where Professor Drew Harvell is the curator. The collection was recently featured in an award-winning film, Fragile Legacy (http://fragilelegacy.info),
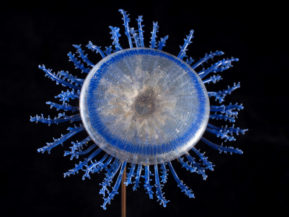
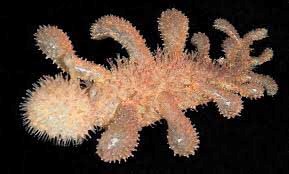
Figure 1. – Blaschka – 560
Figures 1-3 show some of the more than 500 glass figures in the collection. They illustrate the gamut of detail and transparency in the collection. We have begun our efforts with the simpler, relatively opaque glass models (e.g. Figure 1). Imaging the beautifully detailed transparent jellyfish (Figure 3) is a challenge for the future.
Figure 2. Blaschka-460Figure 3. Blaschka – 216
To image the 2.5-inch squid shown in Figure 1, we are using photogrammetry of DSLR images. The photographs were made by David Brown, the museum photographer at Cornell’s Johnson Museum and producer of the film mentioned earlier. The software is AgiSoft PhotoScan and some finishing touches were added in Blender. The processing was done on a Dell M4800 with a Quadro 2100 GPU. The PhotoScan software works well and has an excellent user interface that allows separate user controls for each of several processing steps. Autodesk Memento seems promising, but is currently still in beta until summer of 2016.
Positioning the model. The model was placed on a turntable and photographs were made at turntable intervals of 2-10 degrees. This process was repeated at several angles of elevation and for several orientations of the model.. Inter-photo alignment can be done with benchmarks placed next to the figure. However, when the model is placed in different positions on the turntable, benchmarks cannot be used. All the photos were masked both (a) to remove background detail, which would confuse the alignment, and (b) to reduce processing time, which can run up to several hours.
Lighting. The photogrammetry requires uniform lighting, a minimum of shadows that change positions between photos, and a minimum of specular reflections from the model’s glossy surface. The photos were all done in a soft-light tent. De-glossing the model with spray or powder coatings was impossible due to the sensitivity of materials in the models. Polarization can be used to control reflections but was not necessary in this case. This helped maximize the light on the subject, which was necessary to use small apertures for maximum depth of field.
Detail and hidden surfaces. We made many photos and numerous processing runs to get the right photos to capture the detail of the squid. The photos must provide (a) all the necessary viewing angles, and also (b) a precise framework for inter-photo alignment. The final model uses about 200 10MB photos.
Post-processing. Some details of the transparent sections were not rendered exactly by the photogrammetry. For these we used Blender to smooth out the two glassy tentacles and refine the shape of the suckers. With such “artistic” intervention, care must be taken to be as faithful to the original as possible.
A 3D image of our first model can be seen at https://p3d.in/zuD9C/shadeless (rendered in Figure 4). The results show the capabilities of 3D imaging to capture detail and surface texture in delicate subjects. We look forward to imaging more of the Blaschka collection as well as items in other collections.
Figure 4. Rendering of the Photogrammetry-Generated Model of Blaschka-560
———————————————————————–
Mallison, H., Vogel, J. & Belvedere, M. (eds.) 2014. Digital Specimen 2014 – Abstracts of Presentations. Museum für Naturkunde Berlin. http://www.naturkundemuseum- berlin.de/forschung/tagungen/digitalspecimen-berlin-2014/home/abstracts-of-presentations/
So you’ve just bought a new Projet x60 Series 3D Printer? Now what? Before you start printing models for your projects I would recommend printing a few sample models to get a better idea of the workflow needed to efficiently operate your new 3D printer. You should practice sending print jobs, then extracting, de-powdering and infiltrating the 3D printed models. Going through this 3D print process is a good idea since the Projet x60 series printers uses Visjet PXL Core (powder) as its build material and supports, so when a build is finished you will need to dig out your model using the vacuum and cleaning station, if you are not careful you can easily damage your model while vacuuming and brushing the powder off your model. I would say it is very similar to how an archaeologist would dig up artifacts or fossils, they need to carefully remove the fossil from the earth and clean off any excess material of the fossil .
After you are done removing your model make sure to follow the cleaning and maintenance procedures from the Projet x60 Pro user manual so that it is ready for the next build. All you have to do now is find some sample models to practice with and you should be ready to print 3D models. It is best to make cleaning the printer after every build a standard practice to avoid any future issues with the printer.
There are many sites online that you can download and print 3D models from and since you just bought a Projet x60 series 3D printer, I would recommend going to the 3DS Central website and downloading some samples from their parts library. They have models from all industries and I have chosen a few of the best AEC models that I recommend printing to fine tune and practice your 3D printing workflow.
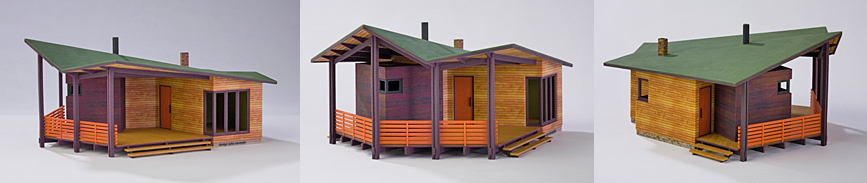
The first is the Sauna House, it is a great looking exterior of a small house and uses color very well to highlight the details of the house’s exterior design.
3D Systems Part Library – Sauna House
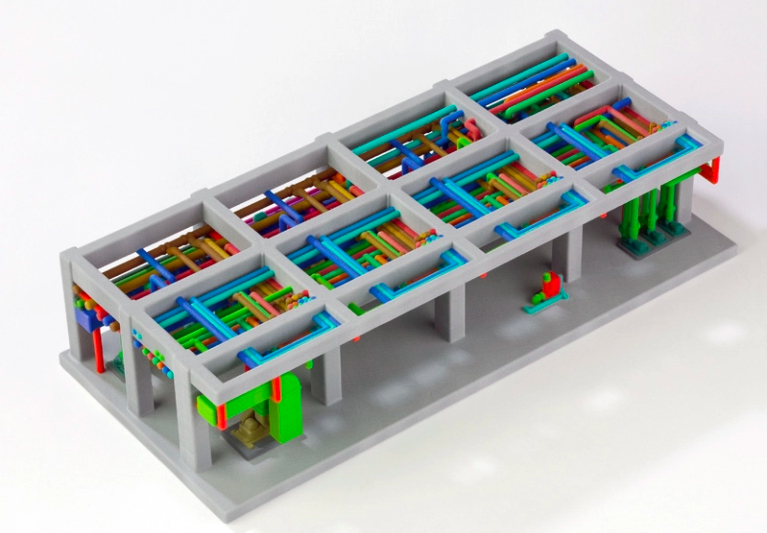
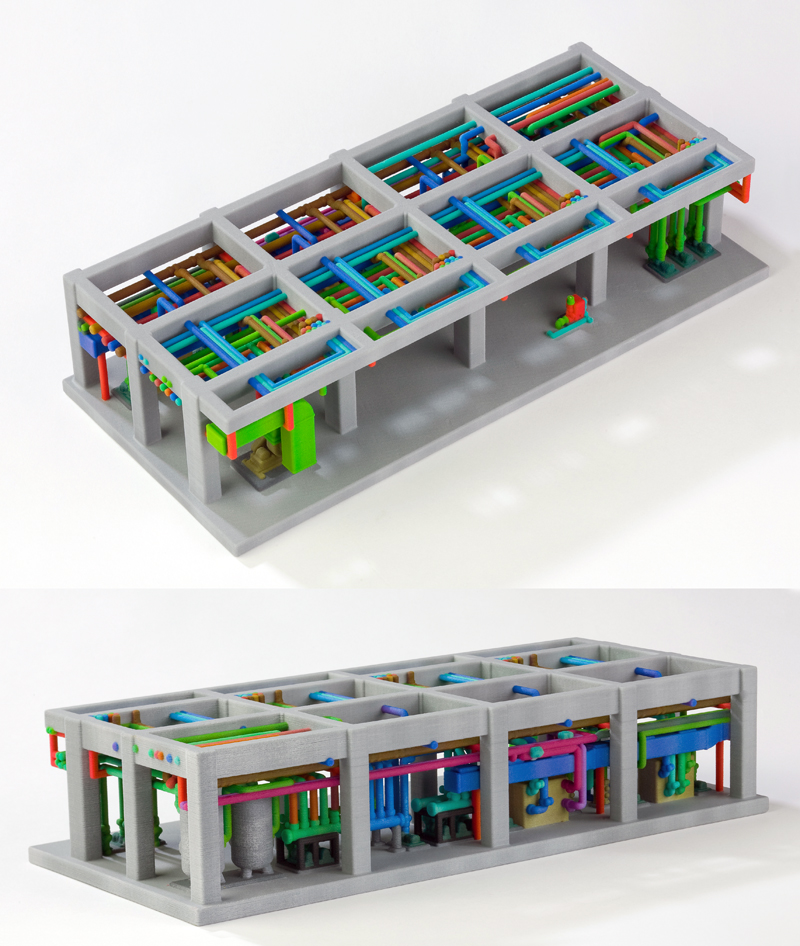
The next model I recommend is a favorite to our MEP clients of the AEC industry, it is the Shinryo Team S Plant model. Each pipe is uniquely colored to help distinguish where it connects to, making it easier to trace the pipes. Models don’t need to be printed in monochrome anymore, with the Projet 660 you can print highly detailed color models that can highlight specific parts or the whole model itself.
3D Systems Part Library – Shinryo Team S Plant
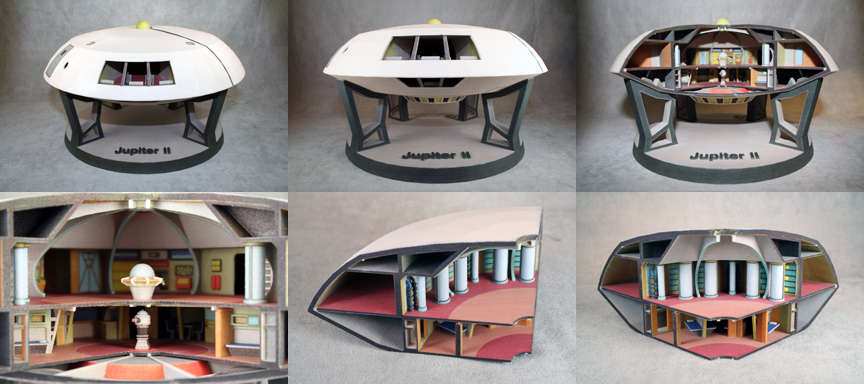
The last model I recommend printing is the Jupiter 2 from the Lost in Space TV series. Other than being a space ship, it is a great challenge model to practice removing larger builds with many small and intricate details as well as good practice for any multi piece interior design models you may need to print.
3D Systems Part Library – Jupiter 2 – Cut Away Interior
Of course you don’t have to print what I recommended here or from the internet, you will probably have your own files where you want to test out the color, tolerances, etc. As long as you have gone through printing a few models before you get into full production you shouldn’t have any issues using the printer and you know what they say practice makes perfect ;). Printing samples will also help burn in your new Projet x60 series printer and help point out if there are any issues that need to be resolved or if any re-calibration needs to be done, of course this is the exception and most new Projet x60 series printers will not have any issues with them. But it is better to have the peace of mind of knowing everything is working properly before you start printing models for your projects. If you do run into issues, don’t hesitate to call or email us.
Stay tuned to our blog for more information on ordering consumables for your Projet x60 series 3D printer and more new user information.
Features the latest informative and technical content provided by our industry experts for designers, engineers, and construction firms and facility owners.