


Getting Started with Your Enscape Software
By David Spergel | Virtual Reality, Visualization
Overview
Installing Enscape for the first time should be simple and straight forward. However, for best results we recommend that, before installing Enscape, you should make sure that your CAD software is not open and that you also have the user rights to install software on your Windows operating system. You can then simply open and run the Enscape.msi installer from the location on your machine that it was downloaded to.
If this is not the first time that you have installed Enscape and you have a version of Enscape prior to version 2.6 installed, we highly recommend that you uninstall that version, remembering to move any files you wish to keep to a temporary location before uninstalling. It would also be advised that you reboot the machine before running the version 2.6 installer.
Open the Installer
When installing Enscape for the first time, the initial screen will request that you agree to the End-User License Agreement (EULA). The ‘I accept the terms in the License Agreement’ checkbox needs to be checked, allowing the Install button to become available. You can also print the EULA via the Print button, or you can choose to press the Cancel button if you do not want to proceed with the installation.
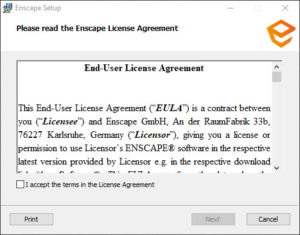
Enscape EULA
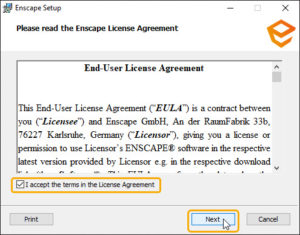
Install button activated
You will then be asked to select the language that you would like Enscape to be installed under. Currently, the options are English (US), German, French, Spanish, Portuguese, Italian, Dutch and Polish (with more languages to come). In this window, you will also be able to click the Advanced button, to choose whether to install Enscape for all users of the machine or just the current user.

Language Selection
NOTE: the language can be changed after installation, if required. The option to do this is found in the Enscape General Settings window under the Preferences options.
If you have a previous version of Enscape installed, or if you are missing any software that Enscape requires to function correctly, then the next screen you’ll see is the Requirements screen.
You can click the Skip button, even if the machine is missing any of these requirements or if you decide not to remove any previous versions of Enscape. However, it is advised that you click on the Perform uninstall button and that you also make sure that you install any missing requirements that are listed in this window, as Enscape will not function correctly otherwise.
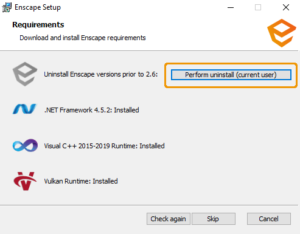
Uninstall previous versions of Enscape
The installer for versions prior to version 2.6 will open (you can confirm this as it will show the old Enscape logo in the installer dialog) and it will indicate the target uninstaller location next to Uninstalling from:. Click on the Uninstall button to uninstall the previous Enscape version.
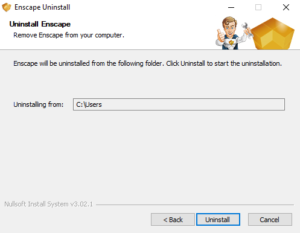
Uninstall location of the previous Enscape version
You will then see the following window, indicating the uninstall process is running and when it will have completed. By clicking on Show details after the process has run, you will be able to see which files were uninstalled. Or, just click on the Close button to close that old installer dialog.
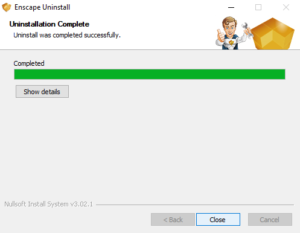
Show details if uninstalled files and close the window
You will be returned to the Requirements page of the current installer dialog which should indicate that the process was completed. If you want to be sure of this, or if the installer indicates that a previous version still exists, then you can click on the Check again button.
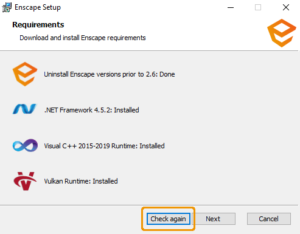
Check again for previous Enscape versions that are installed.
If one of the other requirements is missing, this will be indicated next to the missing requirement whereby a prompt will request that you Download that missing element.
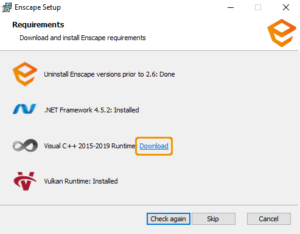
Download missing Requirement
Once you click on ‘Download‘ the missing software will automatically download and the installer for that software will then be required to be manually started and opened after download is complete. By default the downloaded installer will be available in your systems Download folder, or directly from your browser. The installer for each software required to run Enscape will guide you through the installation process for its installation. Once installation has been completed, click the Check again button back in the Enscape installer dialog which should allow you to continue the installation process.
If all previous versions of Enscape have been successfully uninstalled and all software requirements have also been installed on the machine you will then be able to click on the Next button to proceed with installing Enscape.
Simple Installation
After clicking on the ‘Install‘ button once the language has been selected, and there are no missing requirements, then the Requirements dialog is skipped and the installer will proceed to install Enscape and all its subfeatures, but only for the currently logged in user. You will therefore find that it installs to the default location: C:\Users\%username%\AppData\Local\Programs
The installer will then run and you should see this in the installer window as shown in the following screenshot.
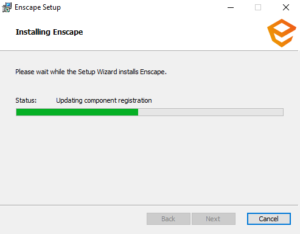
Enscape is installing
Once it has finished, you will then see the following screen indicating Enscape has finished installing.
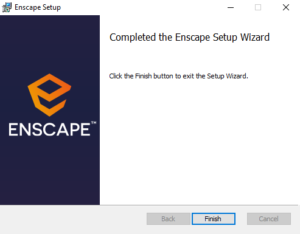
Enscape has finished installing
You should then be able to open your CAD where you should see Enscape as a top level menu option, or as a Toolbar. If you can not see Enscape in your CAD, then you may need to enable it in the CAD’s workspace.
Advanced Installation
As mentioned at the beginning of this article, the Advanced button becomes available once the ‘I accept the License Agreement‘ checkbox has been checked and you have clicked ‘Next‘, whereby you will be asked to select the Language. The Advanced button is available only at this point of the installation process and will give you additional options for the Installation Scope. As this option is only available on a fresh installation of Enscape, if you want to access these options again, then you will need to uninstall and reinstall Enscape first.

Advanced button
This will allow you to specify a custom installation starting with the option to Install just for you, the currently logged in user, where it is installed in a per-user folder, or Install for all users of this machine, meaning it installed in a per-machine folder. In the screenshot below, if you choose the Install just for you option, that currently logged in username will be placed between the brackets in the installer window to confirm which user folder Enscape will be installed to.
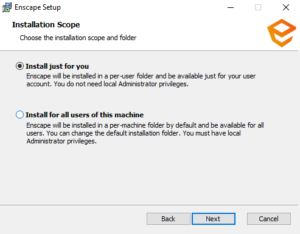
Installation Scope
Install for Single User
If you choose the ‘Install just for you’ option, then the additional options to specify a custom installation, including whether to install the plugin for only one specific CAD, multiple CADs, or all CAD’s becomes available.
Select which CAD’s to install Enscape for
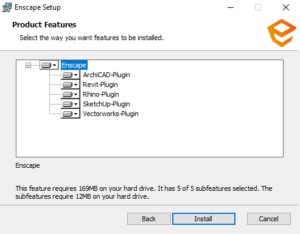
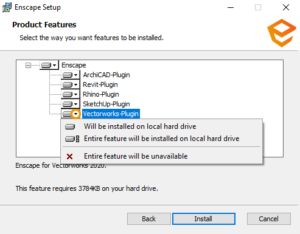
When installing Enscape, the main feature that is Enscape is always installed. You can then also choose to install each individual CAD specific subfeatures of Enscape by clicking on the small arrow next to each CAD listed, as shown in the following screenshot. You should then select the option ‘Will be installed on local hard drive’. If you want to install Enscape and all the subfeatures all at once, then choose the ‘Entire feature will be installed on local hard driver’ option. Please note that this install option will only take effect when selected in the top level Enscape main feature menu option.
You can choose to not install individual subfeatures by selecting the option ‘Entire feature will be unavailable’ from each subfeature menu.
Change CAD installation options
When done, click on the Install button which will allow the installation to proceed.
Once installation is complete, you will then see the following screen which confirms installation has been completed.
You should then be able to open your CAD where you should see Enscape as a top level menu option, or as a Toolbar. If you can not see Enscape as an option in your CAD, then you may need to enable it in the CAD’s workspace.

The installation process has completed
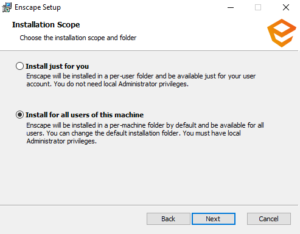
Install for all Users
Choosing the option ‘Install for all users of this machine’ will mean that you have an extra option to change the installation location.
Install Enscape for all user of the machine
You will then be shown the following screen, indicating the current default installation location. Click Change to alter this location.
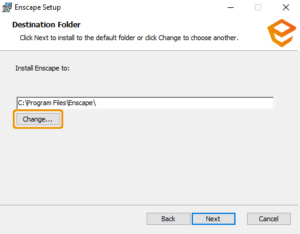
Destination folder for installation
You can then change the installation location by navigating to the location you want to install Enscape to under the Look in: drop down menu.
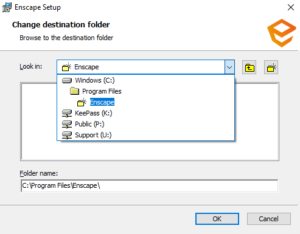
Changing in the installation location
You can use the two buttons  to navigate up a level in the file structure or respectively create a new folder in the current location.
Here, you can see that we have changed the installation location, which is reflected also in the Folder name: section.

Installation location is changed
Once the installation location has been chosen, you can then click on OK and this will take you to the Product Features window, whereby you can select which of the Enscape subfeatures you want to install.
Change, Repair, or Remove Enscape
Once Enscape has been installed, if you want to change the installation location, or if you have to repair the installation, or if for some reason you would want to uninstall Enscape, then you can run the Enscape .msi installer again to perform these processes.

Change, Repair, or Remove Enscape
Change the Enscape Installation
Clicking on Change will return you to the Product Features window, where you can again choose which subfeatures you would like to install or remove.
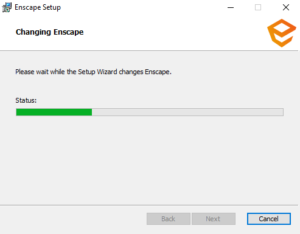
The Enscape installation is being changed
The Product Features window will then be shown, where you can alter which subfeatures of Enscape are installed.
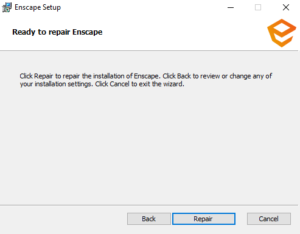
Repair the Enscape Installation
Clicking on Repair will request that you confirm that you want to perform this.
Confirm that you want to repair Enscape
The repair process will then be seen to be running in the installer window.
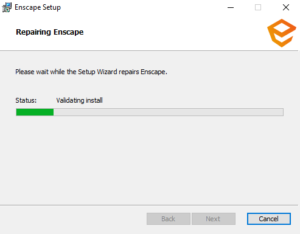
The Repair process is running
On successful completion, the installer will confirm this for you.
Remove Enscape from a Machine
Clicking on Remove will result in the installer asking you to first confirm that you want to remove Enscape.
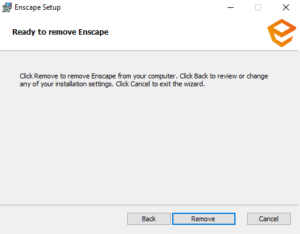
Confirm that you want to Remove Enscape
If you confirm that you do want to remove Enscape, the process will begin and you can see this running in the installer window.
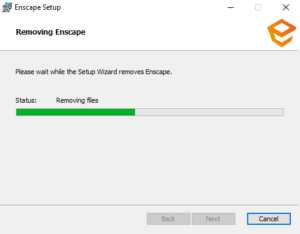
The Remove process is running
Once any of the above processes has finished, the installer will confirm that the process is complete. You can then click the Finish button to close the installer.

The Remove process has completed.
So, this concludes the initial installation process, and once you open the CAD that you want to use Enscape with, you will find that there is an Enscape menu, and / or a ribbon / toolbar available in the CAD.
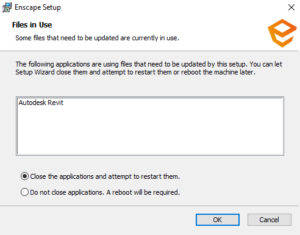
Installation Error Messages
If you have your CAD open when trying to install, repair, change, or remove Enscape, you should get a warning message telling you which CAD is blocking the install process. You then have the choice between; Close the applications and attempt to restart them. or, Do not close applications. A reboot will be required, which will need to be done before Enscape becomes available for use in the CAD.

File in Use installer process error
Once you decided on which method to use Click OK, which will then continue to process.
If the installer is unable to close and restart the application, then you will get the following message:

The installer failed to close the CAD software
Click Cancel to cancel the process, in which case you should close the CAD blocking the process, and then try to run the installer again.
Click OK to allow the installer to continue the process. Once complete, you will get the following message:
Files in use installation error
Clicking Yes will automatically restart your operating system, so you should make sure any unsaved documents open in other applications are saved first. Clicking No will mean that you will manually have to restart your operating system before the changes take affect.
Need more information about Enscape?
Click here to learn more about Enscape, or to contact our visualization experts at enscape@microsolresources.com
INDUSTRIES: Architecture, Buildings