


Best Revit Shortcuts and Hotkeys
By Pook Villegas | BIM, CAD, Collaboration
Split element. Draw axis. Split face. Activate view. Add room tag. Pin. Zoom all.
There are about a million different actions one can take on Autodesk Revit, and I’ve seen them all. It’s not without work though – the average user spends hours on end striving to correctly execute the basic commands and operations necessary to get a model up and running in the beginning.
That’s why I put this article together. It lists out some of the most time-saving Revit Ctrl + shortcuts that I’ve come across in my experience as a Revit user.
Why Revit Shortcuts Matter
Why do Revit shortcuts matter, you may ask? The answer is simple – because your time does. Regardless of whether you’re a beginner or an experienced Revit user, having the right shortcuts at hand can save hours of work. Not only that, but it makes the design process so much easier by limiting interruptions. Mastering Revit keyboard shortcuts means becoming proficient in the language of BIM, therefore reducing the gap your ideas need to cross in order to become reality.
Mastering Revit Shortcuts for Enhanced Productivity
The Revit software is like any other tool – the more you use it, the better you become at using it.
Keyboard shortcuts allow you to quickly traverse the software, set up a 3D view, change current view configurations, insert components, ungroup elements, execute resizes, and more without taking your hands away from the keyboard. This reduces the time it takes to complete tasks and ultimately allows for faster workflows. Everyone could use a little more productivity, and that’s exactly what the benefits of Revit keyboard shortcuts are for.
Key Revit Shortcuts for BIM Design Efficiency
Ready to start navigating your wireframe like a pro? These shortcut commands are a must-learn for any Revit MEP user.
Align (AL)
Starting off nice and simple, the Align command allows you to align different objects within the drawing. This command is handy for making sure that walls, beams, or anything else touches another element with precision. To use it, simply type the letters ‘AL’, click on an object of reference, then click on whatever object you’d like to align dimension ends to.
Copy (CO)
Save yourself some time by replicating existing elements with the Copy function. It’s pretty straightforward as well; just type ‘CO’ to duplicate and place your target object in another spot.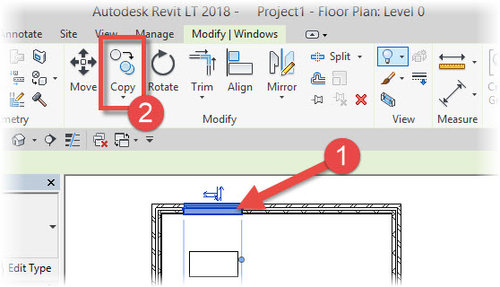
Dimensions (DI)
Who needs the formula for the surface area of a cube when you can just measure it with Revit’s Dimension tool? The ‘DI’ command gives you the ability to quickly place dimensions in your work plane, perfect for making sure that everything is scaled to project units correctly.
Half Tone an Element (HT)
The art of half-toning can be made easier by typing ‘HT’ and selecting an element. This will give you the option to create a dimensional pattern on any object in your drawing, like beams or pipes.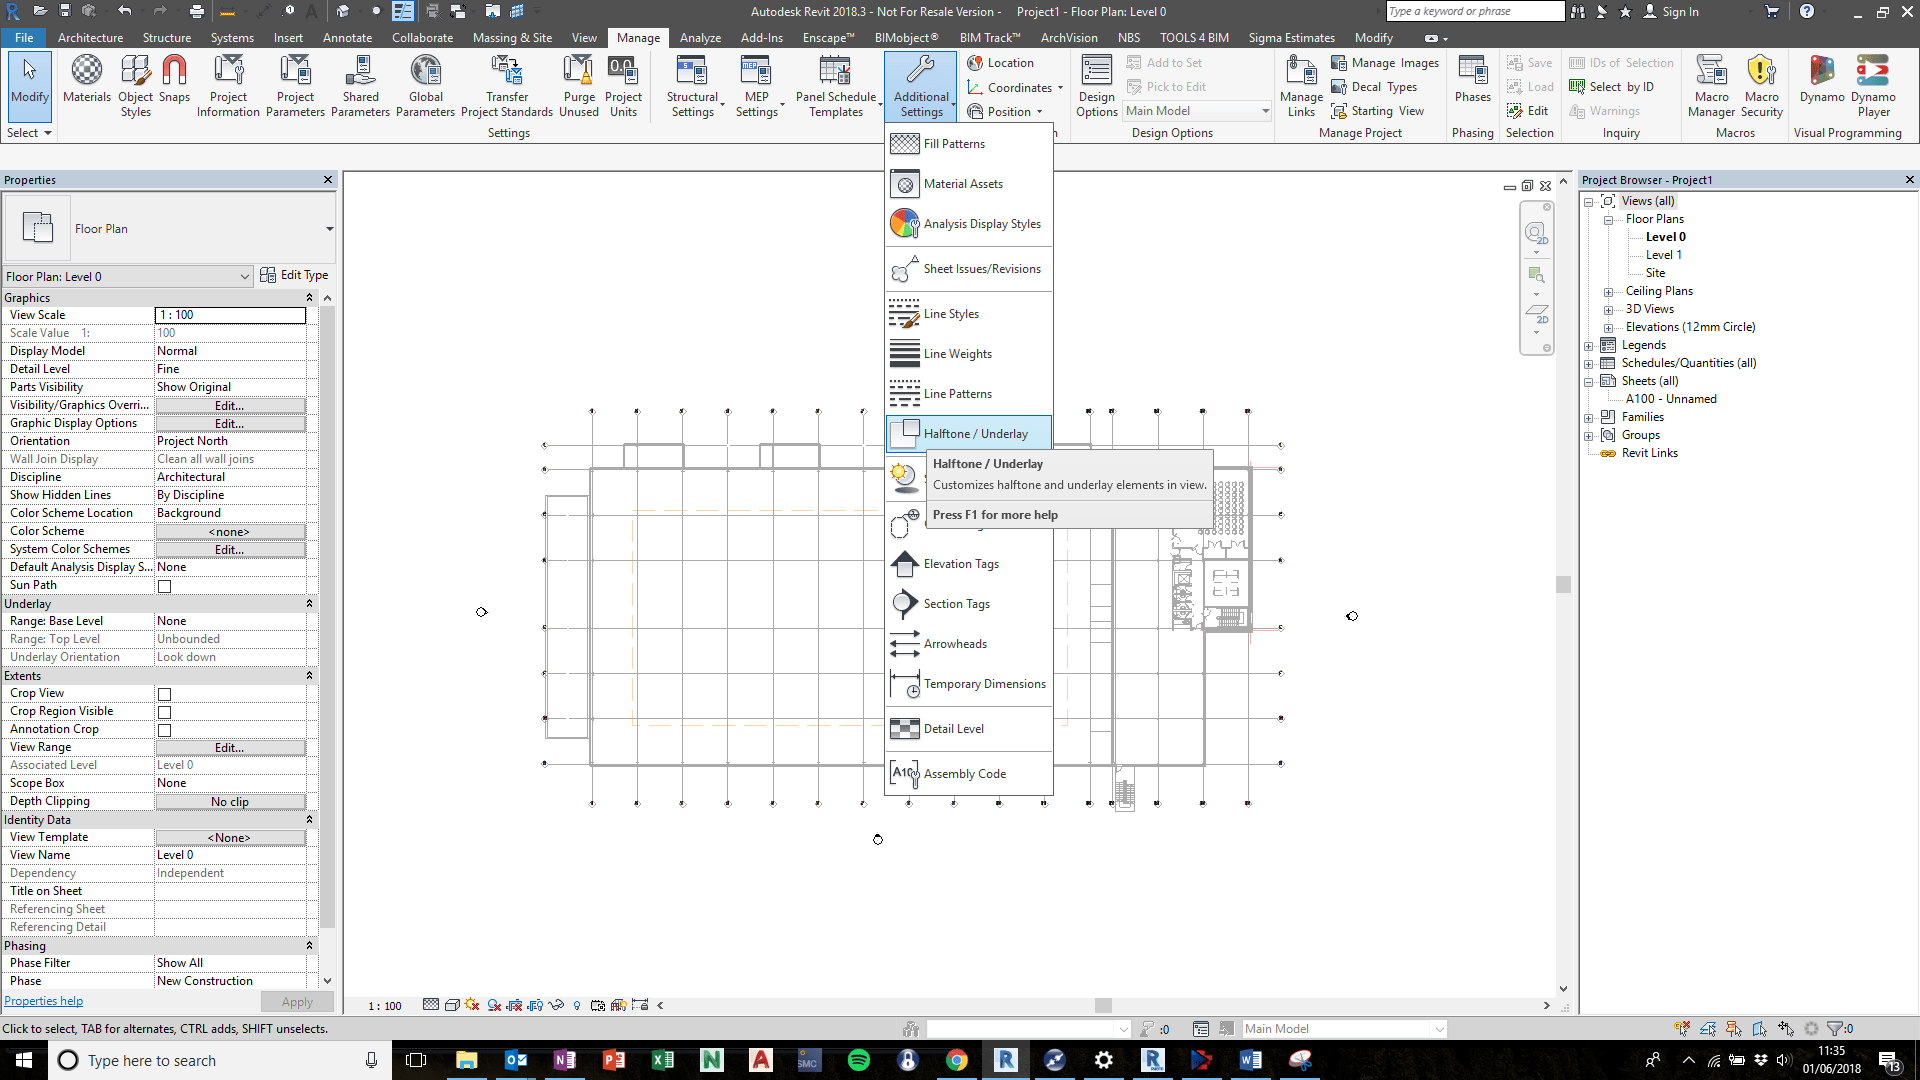
Grid Lines (GR)
Grid lines are essential for ensuring that your drawing is accurately aligned dimension-wise, and luckily Revit’s ‘GR’ command makes it super easy to draw them. With this tool, you can create horizontal or vertical thin lines wherever needed in just a few clicks – just know that the intersections will number sequentially by default.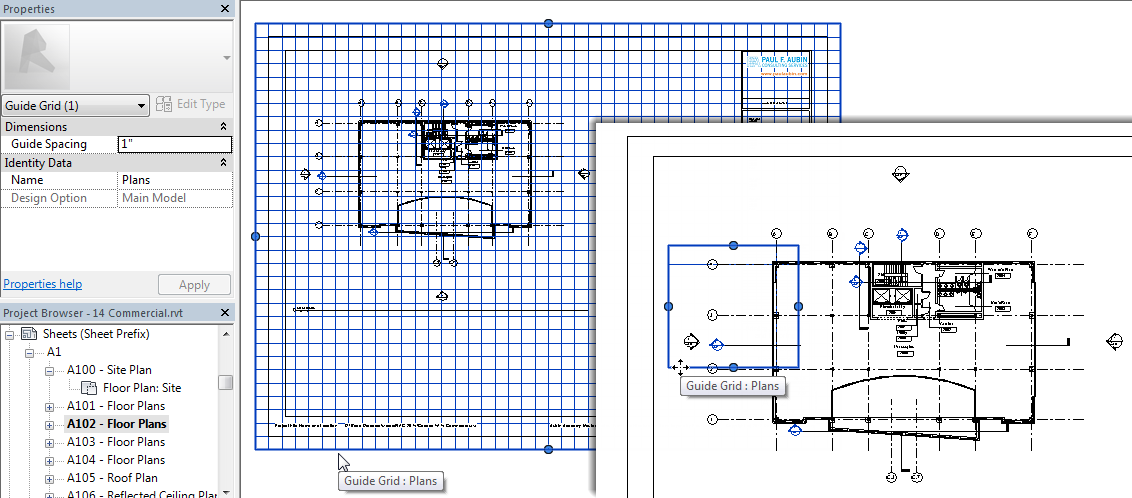
Mirror Pick Axis (DM)
The Mirror command is a great way to create mirror images of existing objects. All you need to do is type ‘DM’ and then draw the line that the object should be mirrored across, or select an existing line with ‘MM’. No more painstakingly flipping objects one by one!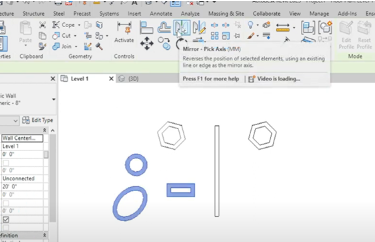
Match Type (MA)
Select an object, type ‘MA’ into your keyboard, and then select a new object to give it the same type properties as the first.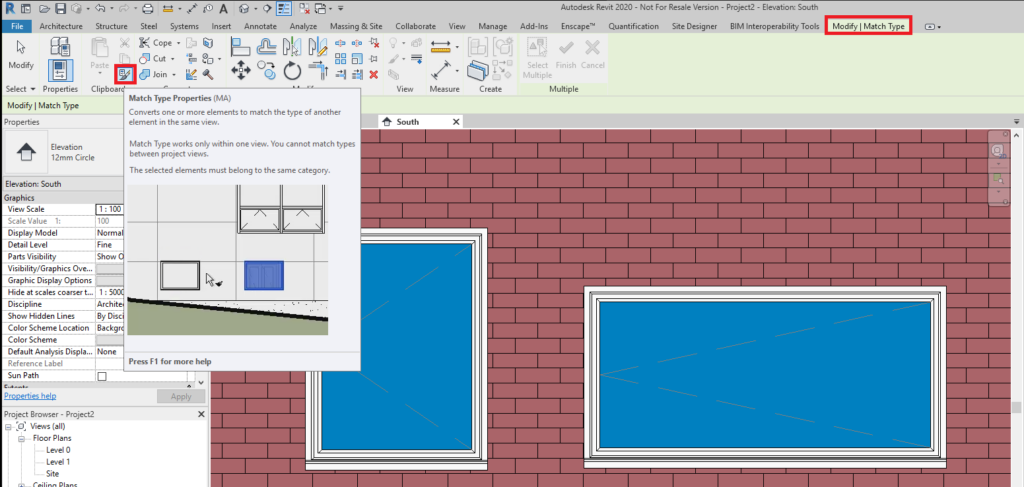
Temporarily Hide Element (HH)
Revit’s Temporarily Hide an Element feature is a great way to quickly make some changes without having to delete things. Just type “HH” and select the element you want to hide in view.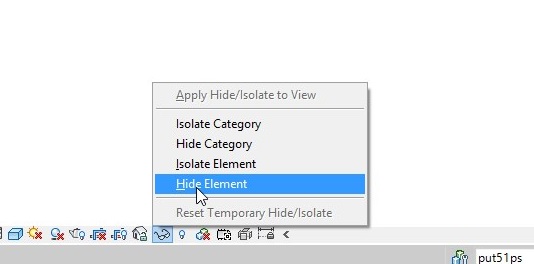
Temporarily Isolate and Element (HI)
Temporarily Isolating an element is similar to the Temporary Hide command. The difference is that the objects you select will be isolated from the rest of your model and will be visible within their own view. To isolate an element, type “HI” and select the hidden elements to be.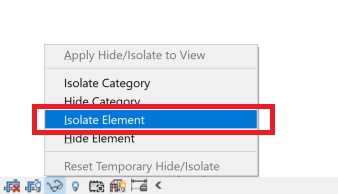
Override Graphics in View by Element (EEE)
Override Graphics in View by Element allows you to quickly change the appearance of objects within a specific view. To use this shortcut, type ‘EEE’ and select the element or elements you want to edit. Once you have a selected element, you’ll be able to adjust its line weights, line styles, and colors. 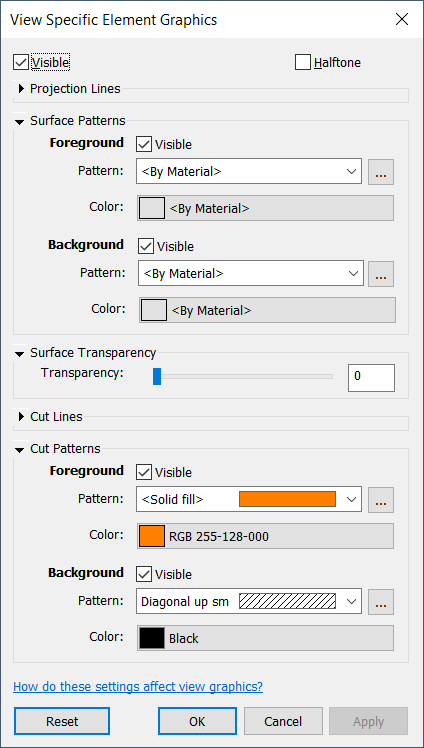
Sync to Central (SS)
Sync to Central (SS) is a feature that allows you to synchronize your local Worksets-enabled Revit model with the central model. Open the Synchronize with Central dialogue by typing ‘SS’ and select the model you want to synchronize. The dialogue box can also be opened through the ‘Collaborate’ drop-down.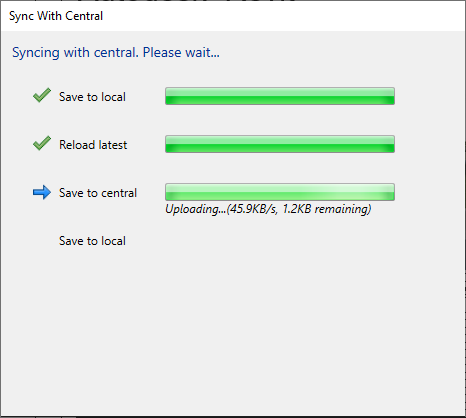
Scale (RE)
‘RE’ makes it possible to easily scale items by selecting a base point, the reference plane or endpoints, and dragging in the direction you want to scale the object.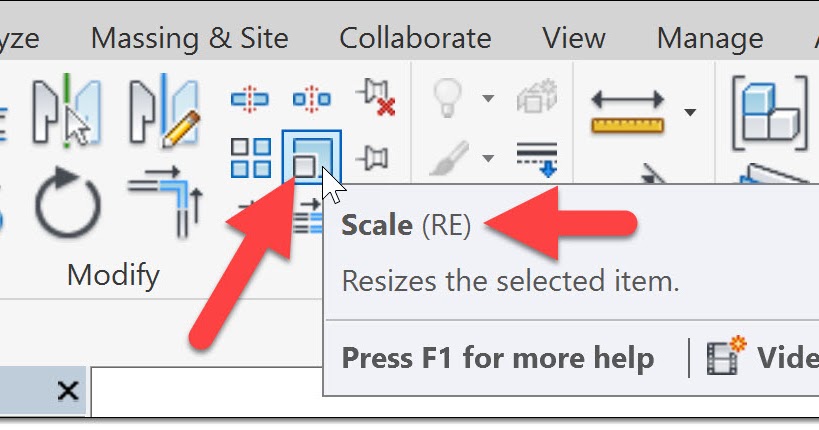
Temporarily Hide Category (HC)
If there’s an entire category of objects you’d like to temporarily scrub from the scene, type ‘HC’. This command will hide all objects that belong to the selected group.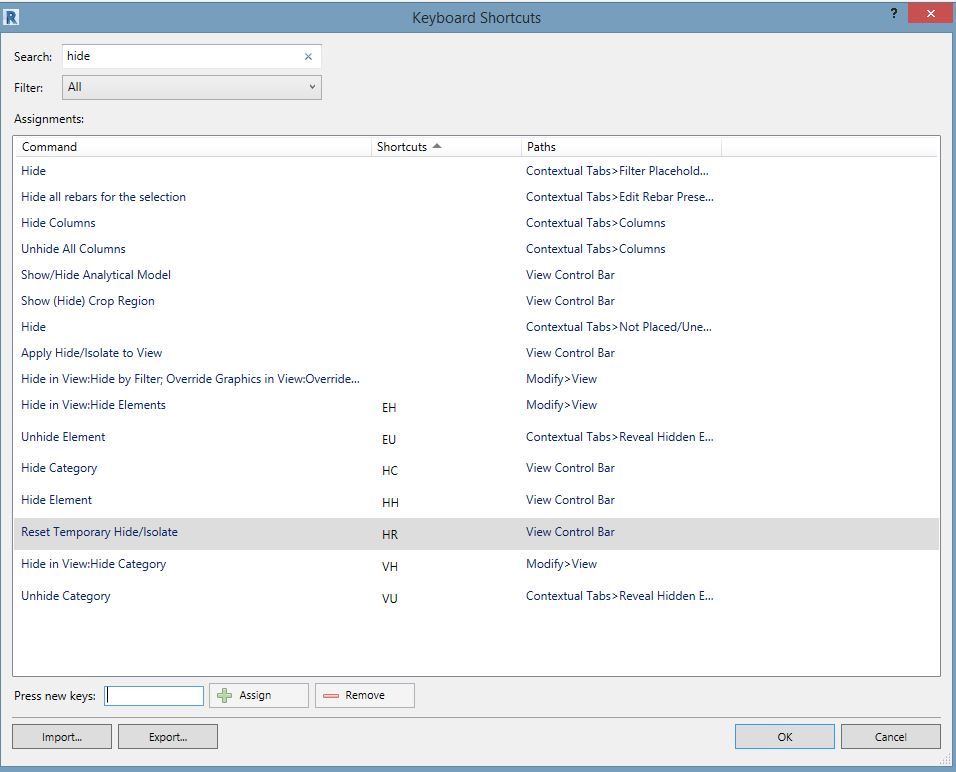
Edit Linework (QW)
The line style drop-down menu lets you quickly switch between different line patterns. For finer control over detail line weights, use the “QW” command to edit individual lines. This shortcut will let you customize the linework of an element in a few clicks.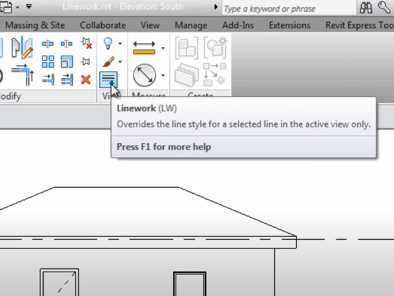
Tips for Effective Shortcut Implementation
Of course, the many Revit shortcuts I just listed will take time to remember. If only we were all as good at learning things as AI is nowadays.
Here are some tips to make things a bit easier:
Associate Shortcuts with Actions
As you practice using the Revit shortcuts, try to associate each one with what it does. For example, when you type in “HG” and select a group from the list that pops up, think of “HG” as a shorthand way to say “hide group.” This will help you remember the shortcuts faster and use them more intuitively in the long run.
Make a Cheat Sheet
It can also be helpful to make a cheat sheet that lists all the shortcuts you want to learn. This way, you can quickly reference it and annotate discoveries as you go. You could even have multiple cheat sheets—one for the basics, one for more sophisticated commands or tasks.
Create Custom Shortcuts
If all else fails, you can always create custom shortcuts in Revit to make your workflow even more efficient. To do this, go to the User Interface drop-down, select ‘Keyboard Shortcuts’, and rewrite the rules in a way that’s easier to remember.
Shortcut commands are meant to save time, but learning to use them efficiently can be a job in and of itself. I hope this list of shortcuts helps you in your journey to becoming a Power Revit and AutoCAD user.
INDUSTRIES: Architecture, Buildings, Interior Design, MEP Engineering, Structural Engineering