


Unleashing Creativity: A Step-by-Step Guide to Creating Stamps in Bluebeam Revu
By David Spergel | Collaboration, News
Bluebeam Revu is a powerful tool that goes beyond basic PDF editing. One of its standout features is the ability to create custom stamps, allowing users to personalize and streamline their workflow. In this guide, we’ll walk you through the step-by-step process of creating stamps in Bluebeam Revu, empowering you to add a touch of creativity to your digital documents.
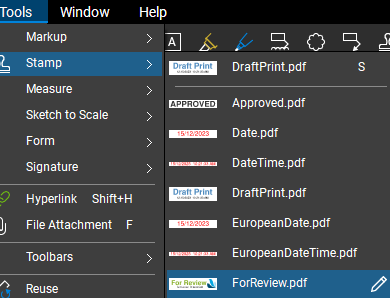
Step 1: Access the Markup Tools
To begin, open the document you want to stamp in Bluebeam Revu. Navigate to the “Tools” tab, where you’ll find a plethora of annotation tools. Click on the “Stamp” icon to access the stamp options.
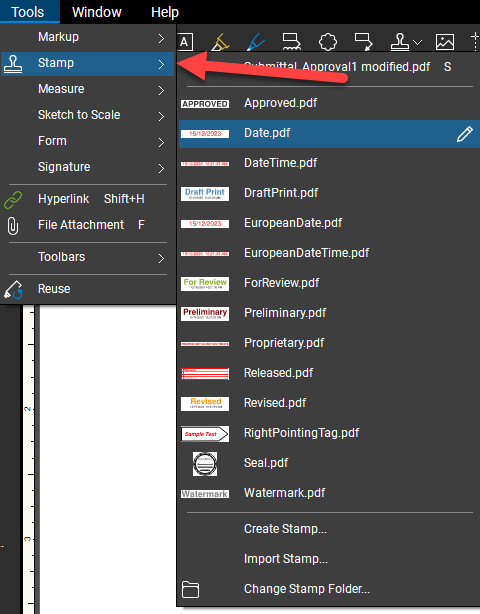
Step 2: Choose a Stamp Template
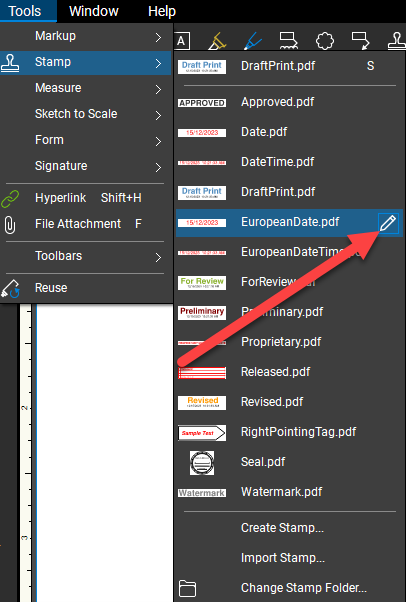
Bluebeam Revu comes with a variety of pre-loaded stamp templates to choose from that you can use to base your stamp off or create an entirely new one. These include commonly used stamps like “Approved,” “Draft,” and “Final.” If you’d like to base your stamp off one of the templates, select the “edit” icon on the right-hand side.
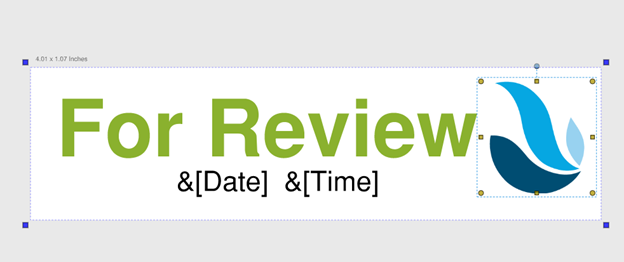
Step 3: Customize the Stamp
Now, let’s add a personal touch to your stamp. Use the markup tools to create and modify the text, font, color, and size. You can also include additional information such as your name, company, or any other relevant details.

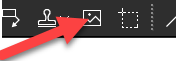
Step 4: Add an Image or Logo (Optional)
Enhance your stamp by incorporating an image or logo. In the stamp editor, click on the “Image” icon and upload your desired image. This feature is particularly useful for adding a company logo, signature, or any other visual element that represents your brand.
Step 5: Save Your Custom Stamp
Once you’re satisfied with the stamp design, click “save” to save your changes. To use the stamp in the future, simply access the “Stamp” tool, and your custom design will be readily available.
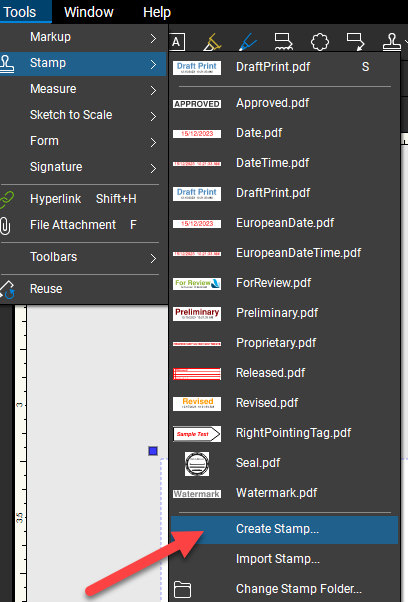
Step 6: Create a New Custom Stamp
For those who crave more customization, Bluebeam Revu allows you to create entirely new stamp designs. To do this, go back to the “Markup” tab, click on the arrow next to the “Stamp” icon, and choose “Create.” This opens a new window where you can design your stamp from scratch, combining text, shapes, and images to achieve the desired look.
Step 7: Save and Share Your Custom Stamps
Once you’ve perfected your custom stamps, save them for future use. Click on the “Stamp” icon, choose “Manage Stamps,” and then click “Import.” This will allow you to save your custom stamps as a toolset, making them easily shareable with colleagues or across different projects.
Conclusion
Bluebeam Revu’s stamp feature is a versatile tool that not only expedites document approval processes but also adds a personal touch to your digital communication. By following these simple steps, you can create and customize stamps that reflect your unique style and branding. Embrace the power of digital annotation and take your document collaboration to the next level with Bluebeam Revu.
INDUSTRIES: Construction