


Single Sign-on (SSO) Setup Guide
By Microsol Resources | IT
Single sign-on (SSO) lets users access Autodesk products and services using the same email and password they use for your organization. This means they only need to remember one password, and if they are already signed in to your organization’s network, they will not need to sign in again to access Autodesk.
Why use SSO?
- Better user experience – Users only need to sign in once, and they do not need to remember multiple passwords. This saves time for users since they are less likely to need a password reset.
- Enhanced security – SSO uses a single point of authentication, so passwords are received and validated only by the identity provider. Since users only need to remember one password, bad security habits such as writing down passwords are minimized.
- Streamlined administration – Admins only need to maintain one email/password combo for each user, and password policies applied to the network are also applied to Autodesk services. So if you revoke an employee’s email access, they will also lose access to Autodesk—no need to revoke access to each service individually.
Scope
Autodesk SSO uses the Security Assertion Markup Language (SAML) 2.0 protocol. We have currently tested and support the following Identity Providers (IdP):
- Active Directory Federation Service (ADFS)
- Microsoft Azure
- Okta
- OneLogin
- PingOne
- PingFederate
Capabilities
- Authentication – Autodesk’s SSO solution supports federated authentication. You sign in to Autodesk Services using your company credentials instead of using an Autodesk ID and password. Autodesk additionally supports syncing groups and users from your company directory via our directory sync capabilities. Please refer to the directory sync section of the help guide for more information.
- Support for Single User Subscription, Multi User Subscription and Token Flex licensing and Cloud Connectivity for 2017 product versions and later.
- SSO Sign in is enforced across all products and services – Autodesk Single Sign on is implemented via email domain, not by product, project or end point, meaning once enabled user is required to use their company credentials for access to Autodesk. There is no hybrid solution using old Autodesk ID + SSO for the same email domain.
Known Issues
- Depending on the current patch level of your deployed software, product updates may be required to implement SSO on all Autodesk products. Please comprehensively test your products and key workflows to ensure user access is as expected.
Setup Instructions
- You’ll need a domain for your organization and an admin account established through an identity provider (a service that stores and verifies your users’ identities), with the ability to set up a SAML connection.
- Make sure your users know about the change to SSO in advance. Once SSO is turned on, users will no longer be able to sign in with their Autodesk password. Instead, they’ll be redirected to their organization’s sign-in page, where they must sign in using the email and password they use for their organization.
- Turning on SSO takes effect immediately, and you can only turn it off by contacting Autodesk Support. It’s important to set it up correctly so that users will be able to access Autodesk products and services. Adding test users is a good way to ensure a smooth process. For information on adding test users, see Test and turn on SSO.
Implementing SSO
This section gives an overview of the steps required to implement SSO. For additional details and step-by-step instructions, read through the full guide.
SSO is available to Autodesk customers on the following Autodesk plans:
- Standard
- Premium
- Enterprise Business Agreements (EBA)
Add and Verify Domains
This section explains how to add domains to your Autodesk Account and verify them so that they can be used for SSO, as well as other admin features such as Directory Sync. Verifying your domain lets us know you are the owner or admin for your organization’s domain name. You will need to add the email domain or domains that your Autodesk users use to sign in to your organization.
Add Domains
- Go to User management > By user or By group.
- Select your team from the drop-down list and click the Team Settings ⚙️ icon in the upper right-hand corner.
- Go to the section Single sign-on (SSO) and select Manage SSO.
- Select Add and verify domains tab > Add domains.
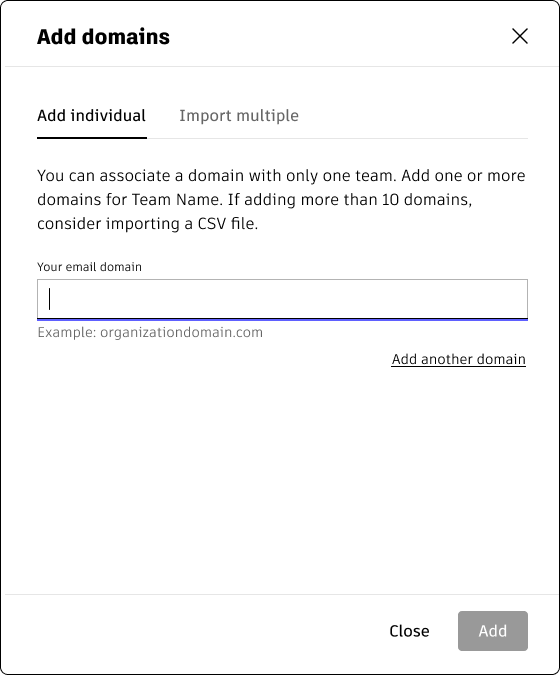
- Here, you can add individual domains manually or import multiple domains from a comma-separated values (CSV) file (recommended for more than 10 domains).
Add Individual Domains
- On the Add individual tab, enter your email domain in the format organizationdomain.com. (The domain name should be entered exactly as it appears after the @ symbol in email addresses for your organization, e.g. for user@example.com, the domain is example.com. Note that your domain may end in a suffix other than .com, such as .org, .gov, or .fr.)
- To add another domain, select Add another domain.
- When you have finished entering all your domains, click Add.
Import Multiple Domains
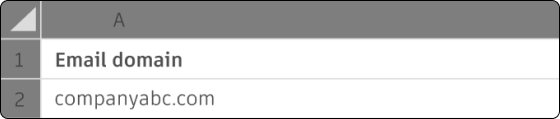
You can add up to 1,000 domains. Existing domains won’t be imported. When your list is complete, save the document as a CSV file.
- Go to the Import multiple tab, then select Upload CSV file. The number of domains found will appear.
- Select Continue to import the domains.
If there are errors in the CSV file (such as a spelling error or a domain that’s already added to your team), you will be able to download the error log for details. Once you have corrected the errors, select Upload corrected file to continue.
Once you have successfully added a domain, it will appear in Single sign-on in the domains list.
Verify Domain
The domains you added will be listed on the Add and Verify Domains tab, along with the domain status (Not verified). To verify a domain, click Verify domain > next to the domain you want to verify. You can verify a domain by uploading an HTML file or creating a DNS TXT record.
Upload HTML File
For this method, you’ll download an HTML file from Autodesk, then upload it to your website root directory (the folder where the website files for your domain name are stored). This verification method works instantly.
- Go to Verify domain > Upload HTML file. Click the link in Step 1 in the screen below to download the HTML verification file.
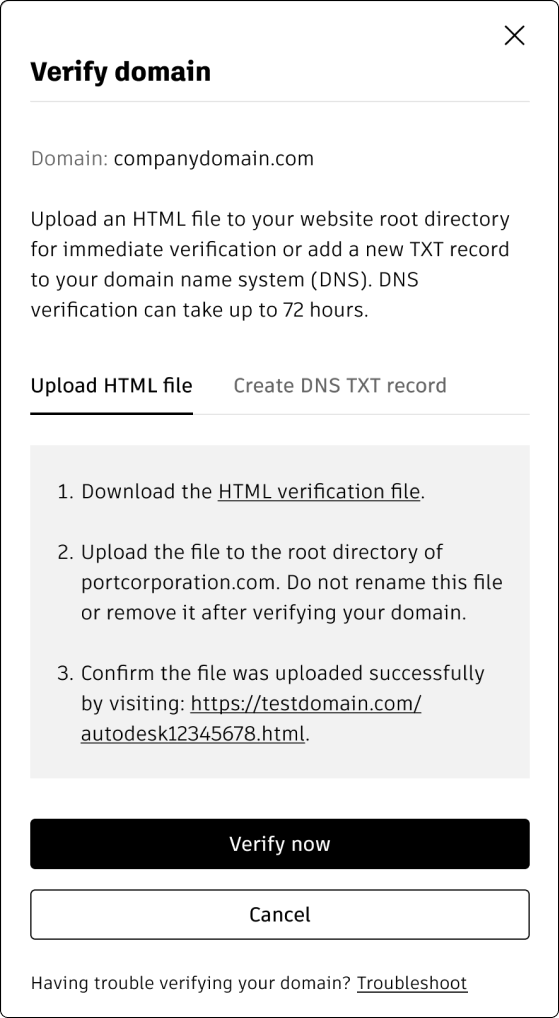
- Upload this file to your website root directory. Do not rename (or modify) the file or remove it after verifying your domain.
- Return to the Verify domain panel and confirm that the file was uploaded successfully by visiting the link provided in step 3 in the above screen. Then click Verify now to instantly verify your domain. Once your domain is verified, the domain status will appear as Verified in your domains list.
Create DNS TXT Record
For this method, you’ll copy information from Autodesk and paste it into a new TXT record in your domain name system (DNS) server. This verification method can take up to 72 hours.
A DNS TXT record can hold any text strings, including machine-readable data that can be used for domain ownership verification. For instructions on creating a TXT record in your DNS server, refer to the documentation for your domain host.
- Go to Verify domain > Create DNS TXT record.
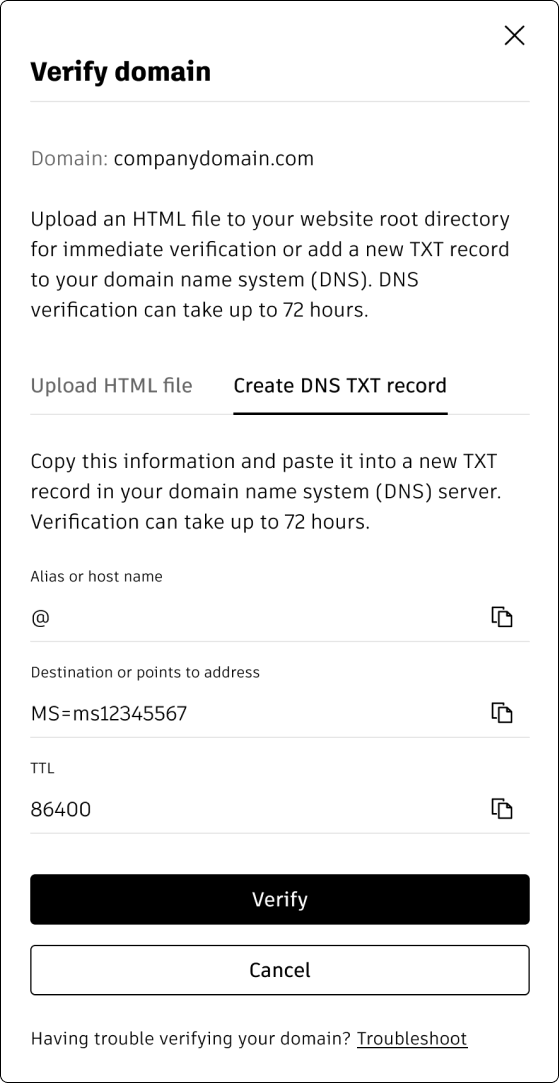
- Copy these information provided and paste it into a new TXT record in your domain name system (DNS) server.
- Alias or host name
- Destination or points to address
- TTL
- Paste the information into a new TXT record in your domain name system (DNS) server.
- Click Verify. Verification can take up to 72 hours. To check if your domain has been verified, you must go to Verify domain and click Verify to refresh the status.
Once the domain is verified, the domain status will appear as Verified in your domains list. In the meantime, you can continue setting up your SSO connection by going to Manage SSO in the “Domain” table.
Set up your connection
Next you will need to set up your SSO connection so that users can sign in to Autodesk with their organization’s email address. This connection uses SAML (Security Assertion Markup Language) to allow Autodesk to communicate with your identity provider to authenticate users.
You can create one connection for each identity provider, up to 25 connections. The connection must be set up and all domains must be verified before you can turn on SSO.
Begin setup in Autodesk
- In Autodesk Account, go to User management > By user or By Group.
- Select your team from the drop-down list and click the Team Settings ⚙️ icon in the upper right-hand corner.
- Go to the section Single sign-on (SSO) and select Manage SSO.
- Select Manage SSO tab > Set up connection.
- You will be asked to name your connection. Enter a name that will help you easily identify the connection between your identity provider and Autodesk. The name you choose can also help differentiate between connections. The name you choose must be unique and not in use by another team or organization.
- Select your identity provider from the drop-down menu.
Begin setup in Identity Provider
For step-by-step instructions, select your identity provider from the list below.
• Set up SSO with Microsoft Azure
• Set up SSO with Active Directory Federation Services
• Set up SSO with PingFederate
• Set up SSO with Google Cloud Identity
Similar to given identity providers, this connection will use SAML protocol to allow Autodesk to communicate with your identity provider to authenticate users. To enable communication, you will need to add metadata from your identity provider to Autodesk and vice versa.
Test and turn on SSO
This section explains how to add test users to a linked domain to test the connection before turning on SSO. This step is optional, but strongly recommended to ensure that users will be able to sign in to Autodesk products and services.
When choosing test users, you should ideally:
- Choose users who you can work with to confirm that they can sign in successfully.
- Add frequent users as well as several users who work on different tasks and projects.
- Make sure that all products for test users have the latest updates.
- Add test users
- Make sure to assign test users access to the Autodesk SSO application that you created with your identity provider before adding them to the test list.
- Add test users who can test signing in with a browser and an Autodesk product. After receiving confirmation of a successful sign in from all users, you can turn on SSO. This will take effect immediately and turning it off requires help from Autodesk Support.
- Go to Single sign-on (SSO) > Manage SSO. Under each SSO connection, you will see a list of your linked domains. (If you have not yet linked a verified domain, see Add and Verify Domains to do so before continuing.) Choose a domain and select Test and turn on SSO.
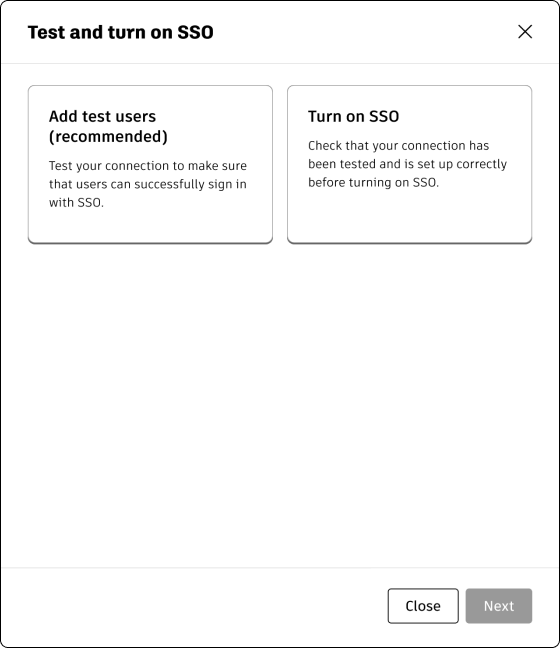
- Select the Add test users (recommended) box and click Next.
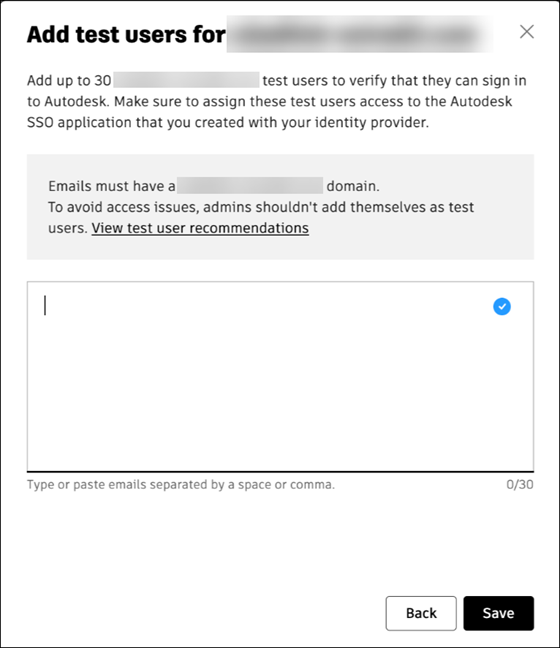
- Enter the organization email addresses of up to 30 test users, then click Add.
- Direct your test users to any Autodesk sign-in page to test whether they can successfully sign in with their organization’s email address. Once you have confirmed that test users can successfully sign in, you can turn on SSO.
Turn on SSO
- Return to Single sign-on (SSO) > Manage SSO. Choose a domain and select Test and turn on SSO.
- Select the Turn on SSO card and click Next.
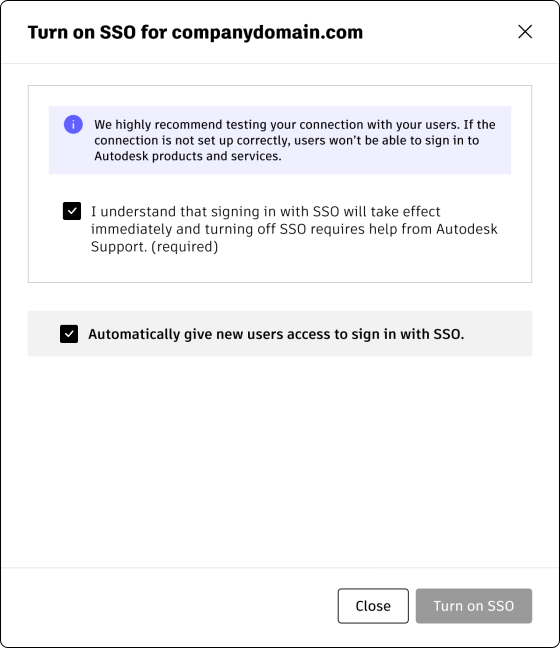
- You will be asked to confirm that you understand signing in with SSO will take effect immediately and turning off SSO requires help from Autodesk Support. Check the box to confirm.
- If you want new users to automatically receive single sign-on access, check Automatically give new users access to sign in with SSO. (You can change this setting at any time under Edit SSO access.)
- Select Turn on SSO. Once SSO is turned on for a domain, the SSO status for that domain will appear as On, and the SSO test users you added during the previous step will be removed.
Your SSO connection is now turned on.
Manage the connection
In this section, you can find instructions for editing or deleting a connection and renewing your identity provider certificate.
Editing a connection
To edit your connection, follow these steps:
- In Autodesk Account, go to User management > By user or By Group.
- Select your team from the drop-down list and click the Team Settings ⚙️ icon in the upper right-hand corner.
- Go to the section Single sign-on (SSO) and select Manage SSO.
- Click the Manage SSO tab and find the domain connection. Click the three dots in the upper right-hand corner of the list of domains.
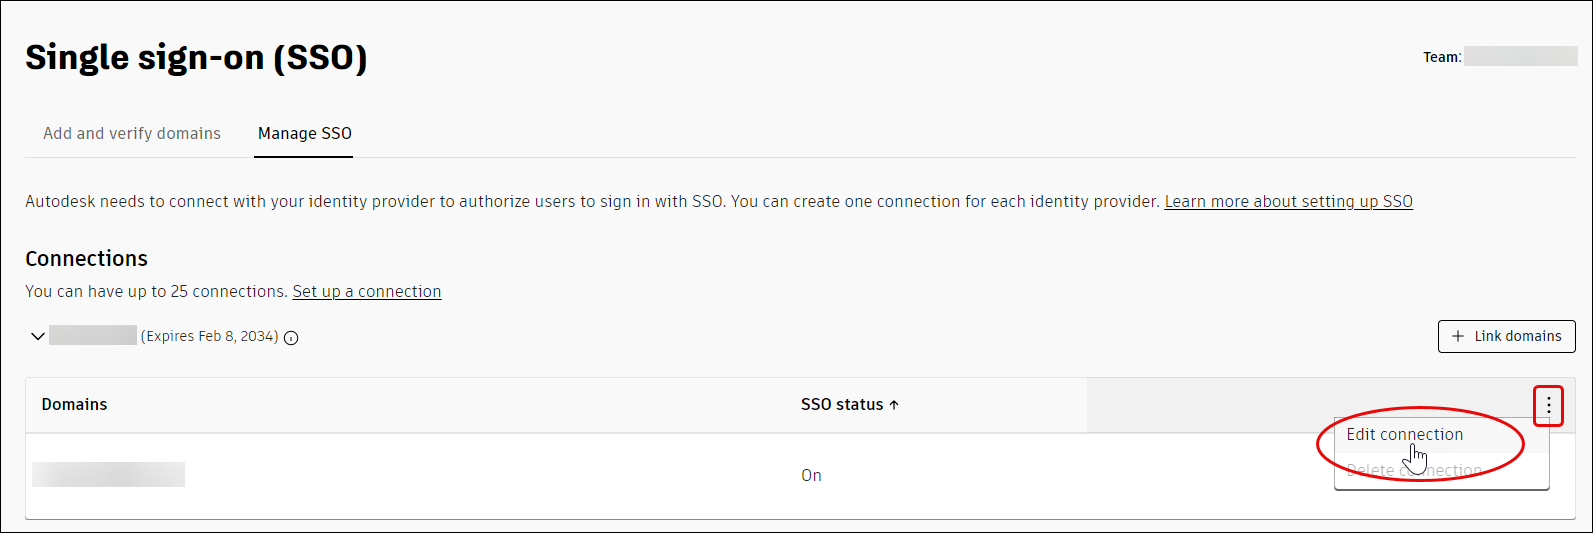
- Click Edit Connection.
Here you can edit your connection name and identity provider metadata. You can also find your Autodesk metadata (to add to your identity provider), renew your identity provider certificate, test your connection, and link verified domains.
Deleting a connection
To delete a connection, you must first unlink all verified domains (see Linking and unlinking domains). Once all verified domains have been unlinked, follow these steps:
- In Autodesk Account, go to User management > By user or By Group.
- Select your team from the drop-down list and click the Team Settings ⚙️ icon in the upper right-hand corner.
- Go to the section Single sign-on (SSO) and select Manage SSO.
- Click Manage SSO tab and find the domain connection. Click the three dots in the upper right hand corner of the list of domains.
- Click Delete connection.
If SSO is turned on, contact Autodesk Support to delete the connection.
Link and unlink domains
To link a domain, you must first verify it (see Add and verify domains). Then follow the instructions in Link verified domains.
If SSO has not yet been turned on, you can unlink a domain by following these steps:
- In Autodesk Account, go to User management > By user or By Group.
- Select your team from the drop-down list and click the Team Settings ⚙️ icon in the upper right-hand corner.
- Go to the section Single sign-on (SSO) and select Manage SSO.
- In Add and verify domains tab, find the domain you want to unlink. Hover over it and click the
 unlink icon.
 - Click Unlink domain.
If SSO is turned on, contact Autodesk Support to unlink a domain.
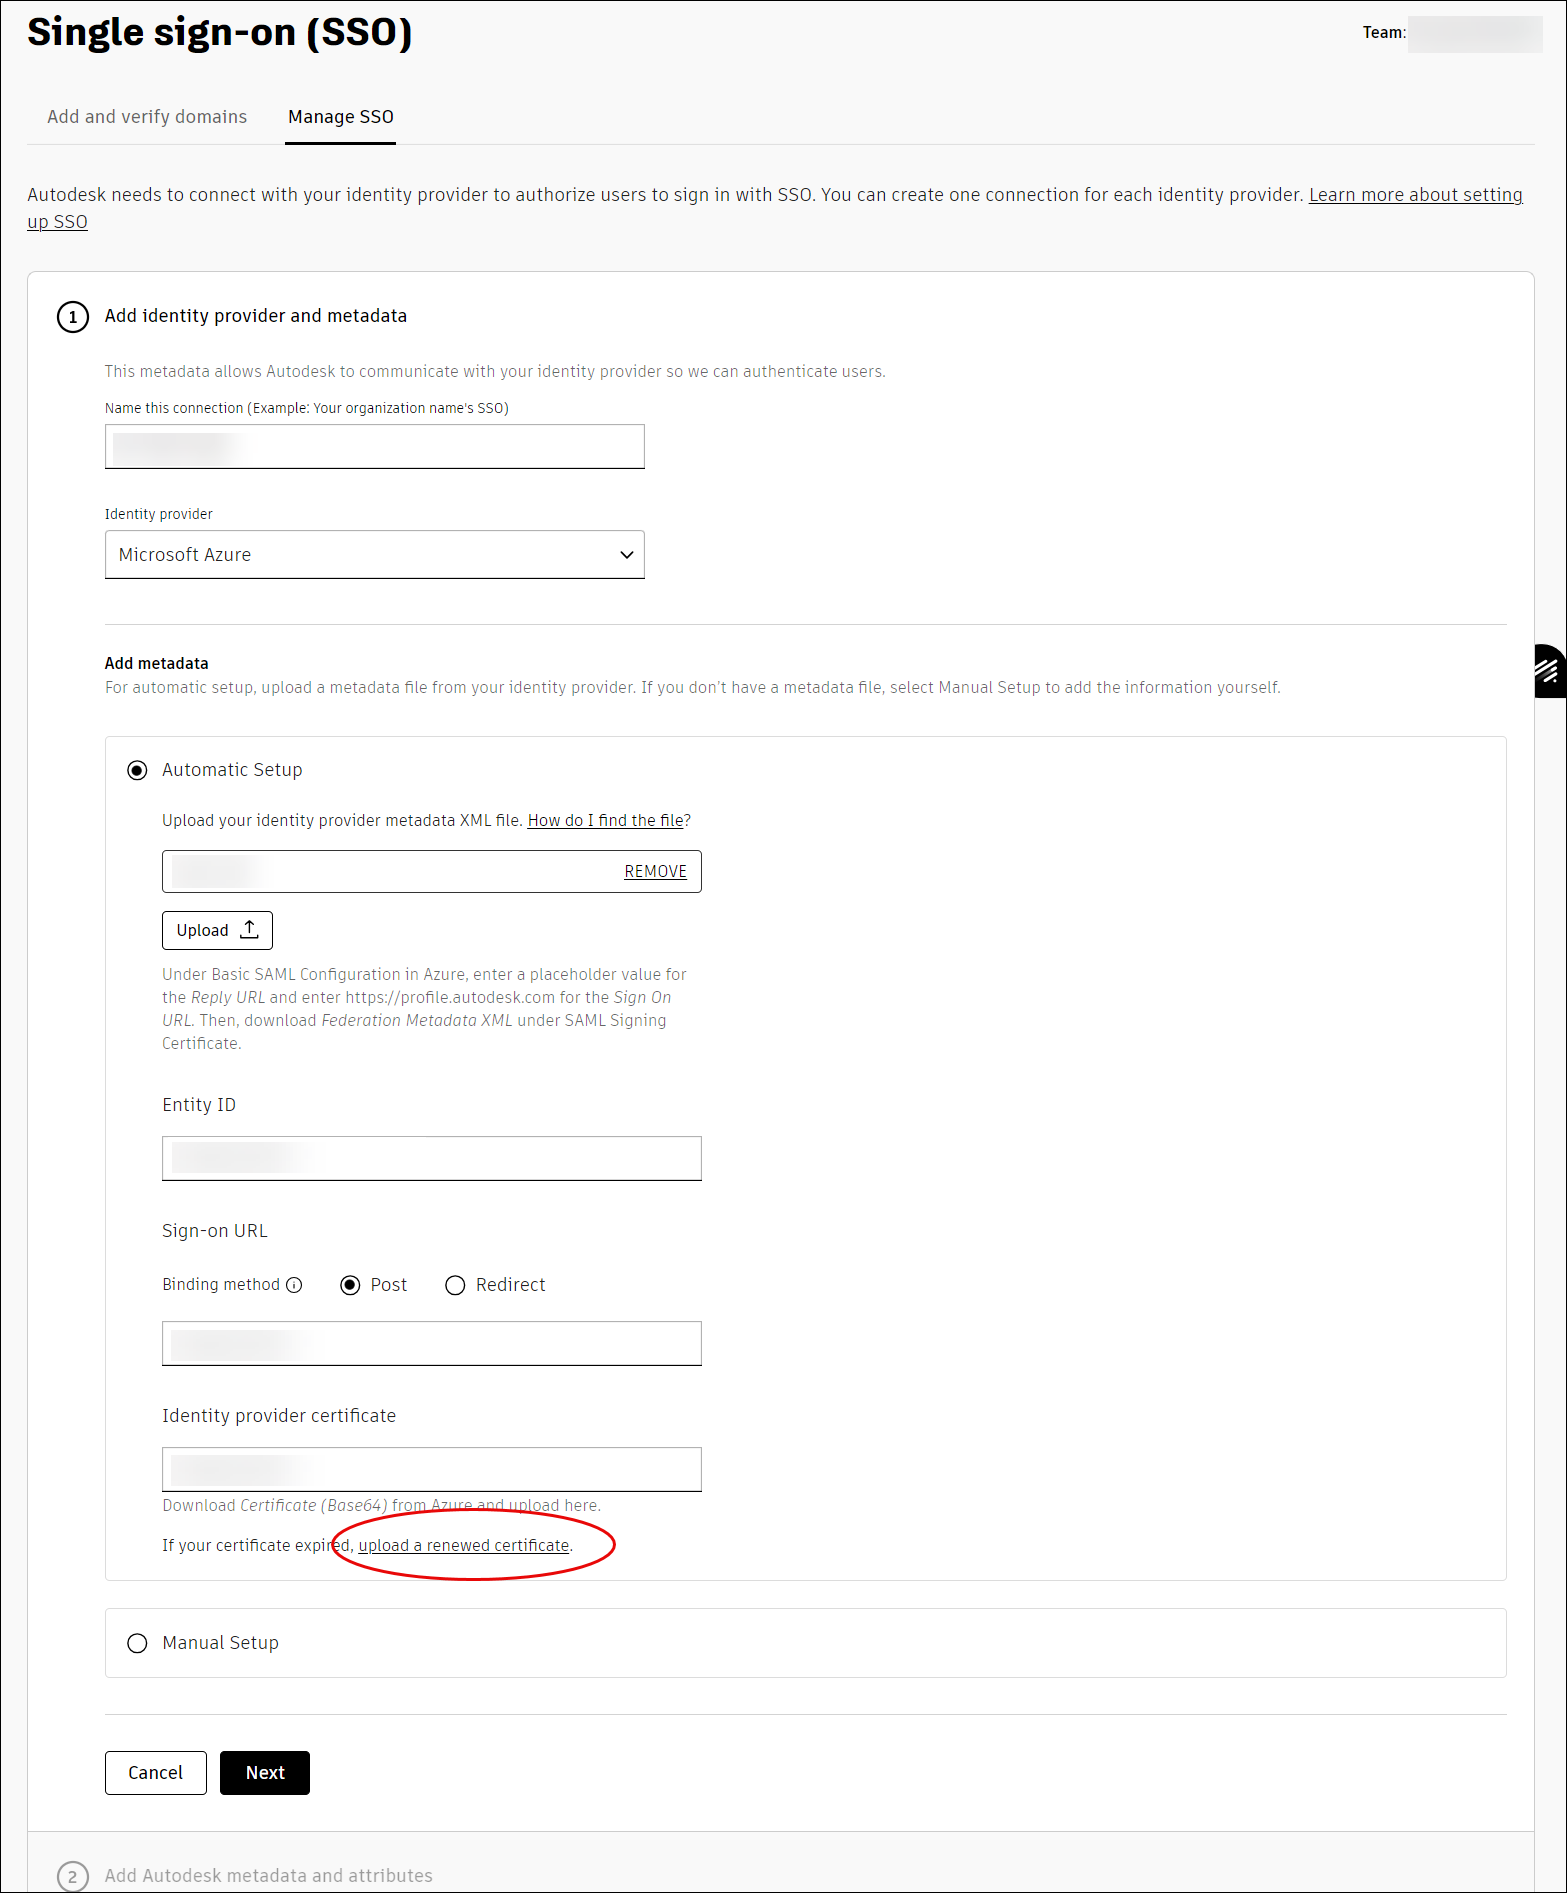
Renewing your identity provider certificate
To renew your certificate, follow these steps:
- In Autodesk Account, go to User management > By user or By Group.
- Select your team from the drop-down list and click the Team Settings ⚙️ icon in the upper right-hand corner.
- Go to the section Single sign-on (SSO) and select Manage SSO.
- Click Manage SSO tab and find the domain connection. Click the three dots in the upper right hand corner of the list of domains.
- Click Edit Connection.
- In step 1 (Add identity provider and metadata), go to section Identity provider certificate and click Upload a renewed certificate.
New users access (Just in time)
Once SSO has been turned on for your domain, any user who is able to authenticate on your domain without an existing Autodesk account will have an account created and added to the organization’s Autodesk tenant.
It is important to note, that with only a few exceptions, the user will not be provided access to any organization data, management of the user is still a separate task to authentication.
For a user to create a new account in an SSO environment:
- In Autodesk Account, go to User management > By user or By Group.
- Select your team from the drop-down list and click the Team Settings ⚙️ icon in the upper right-hand corner.
- Go to the section Single sign-on (SSO) and select Manage SSO.
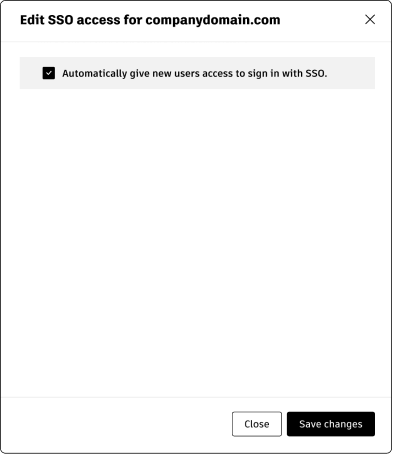
- Click the Manage SSO tab and find the domain connection that is turned on. Hover over it and click Edit SSO.
- You can change the access by checking/unchecking the box and clicking Save changes.
Turn off SSO
If, for some reason, you have turned on SSO in error during testing or have significant user access issues it is possible to turn off SSO, but this must be done via Autodesk Support, we do not provide the ability to turn off SSO within the Autodesk Account.
In order to request SSO be turned off, please create a support case with the account name, domain, and reasons.
Autodesk Support will contact you once it has been disabled and your users will be able to access Autodesk products and services using their original account credentials.
If users cannot recall their passwords they will need to reset them following the standard reset password process.
If users account were created with New users access, they will not have a password – please see the following procedure for these users.
Resolve User Access after SSO is turned off
After you turn off SSO, your Autodesk Account will still be accessible using the same email address and your legacy password (the password set for the account PRIOR to turning on SSO). However, if a user has created an account using the “New users access” method, while SSO was turned on, the user will not have a valid password and steps are required to reinstate this account.
The first time a user without credentials signs in after disabling SSO, they will receive an error. This might fall in either of the following cases.
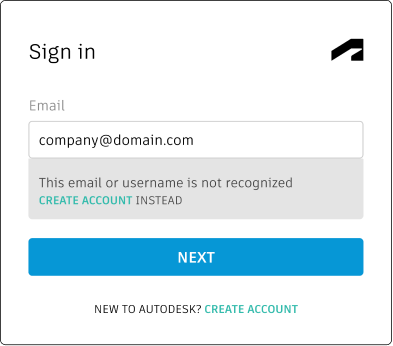
Case 1:
If user cannot recall their password, the following screen displays.
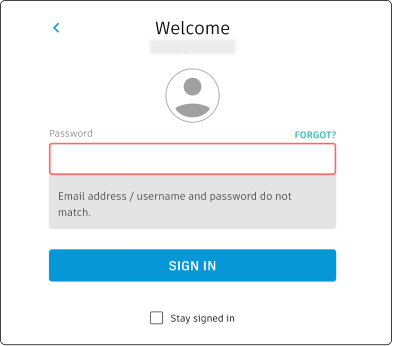
To Recover The Account
- Click Forgot. An email will be sent to your account to reset your password.
- Verify your email and reset the password using standard reset password process.
- Enter the recovered password and click Sign-in.
Once the above process is completed, the user should now be able to sign in and access the Autodesk products.
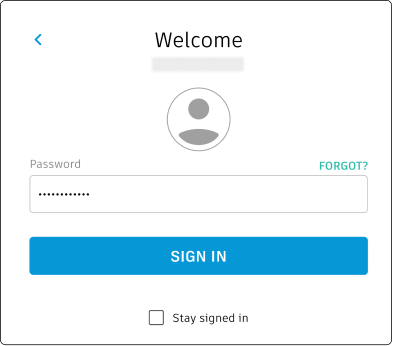
Case 2:
If users account were created with New users access, they will not have a password. Hence, on entering the email credential, the following screen displays.
To Recover The Account
- Select “Create Account“.
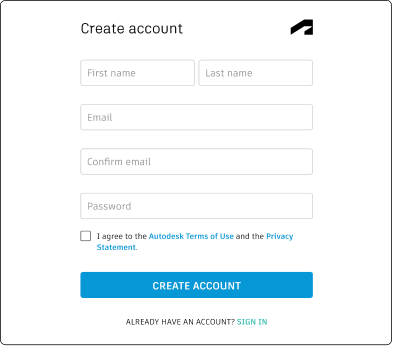
- In the Create Account screen, enter the *”SAME”* email address used for SSO.
- Enter a new password for this account.
- Agree to the terms and Click Create Account.
Once the above process is completed, the user should now be able to sign in and access their Autodesk software and services as usual.
For any additional questions, please contact our support team at support@microsolresources.com
INDUSTRIES: Architecture, Civil Engineering, Construction, Manufacturing, MEP Engineering