A Comprehensive Guide to Setting Up BIM 360 Collaboration for Revit
By John Semel | BIM, IT, Subscription
As some of our customers have found, setting up BIM 360 Collaboration for Revit (“C4R”) involves a number of steps. So grab your coffee, a notepad, and get ready!
Note: This post is updated for 2018 changes and terminology. Some of the screenshots may still reference older naming schemes (e.g. “A360”), but are still accurate.
Purchase Your Licenses
There are two types of licenses that are useful for maintaining your C4R network. The first is a license for BIM 360 Team, which gets you basic access to the Team Hub where your data is stored, and projects are managed. The second is a license for C4R, which adds the collaborative component to the BIM 360 Team license.
Anyone who needs to collaborate in real time must own a license of C4R and must be assigned to that license as a user. The C4R license includes with it a license of BIM 360 Team, which we recommend be assigned to a user that only needs to manage Projects, but does not need to collaborate, e.g. a BIM Manager or IT staff.
Needless to say, we recommend you purchase your C4R seats from your friendly neighborhood reseller, such as Microsol Resources. 😉
Prepare Your Workstations
This provides an opportune time to prepare your environment for C4R.
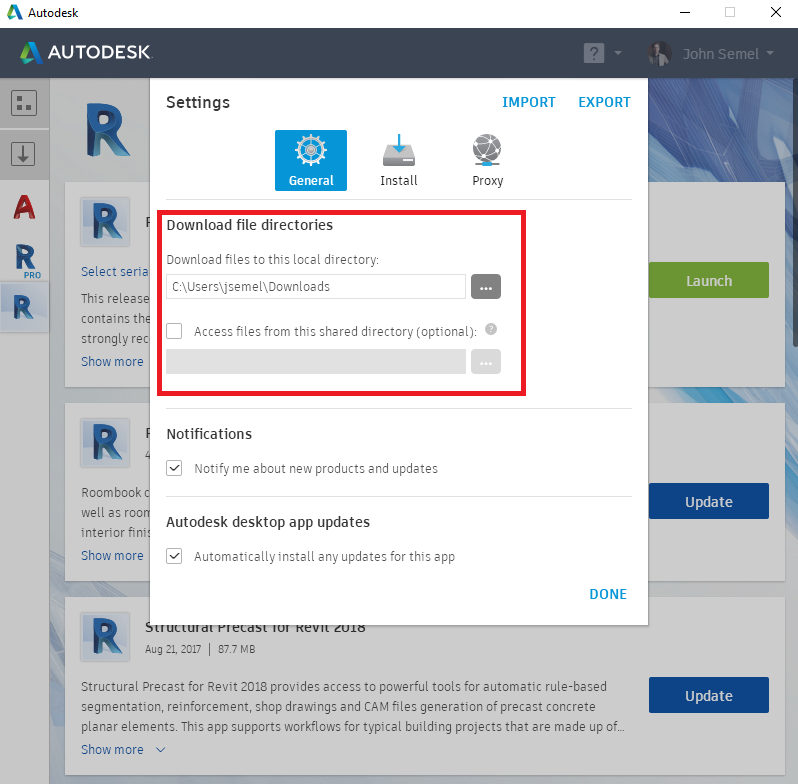
The C4R functionality is built into Revit versions 2016 and later. In order to run C4R on a workstation on Revit 2015 and 2016, you first need to install the separate Collaboration for Revit application. This is available via the Autodesk Desktop App.

Next, Revit needs to be on the latest build. The latest versions are usually available first via the Desktop App, and it should be noted in some cases, these same versions may not be available on the Web days or weeks after the Desktop App release.

Keep in mind that while this is critical for C4R, it has significant impacts for your environment. Regardless of whether you are working on a LAN, in C4R, or using some other collaboration tools (such as Revit Server or Panzura), all users working in a model MUST be on the same build. If the build numbers are not the same, this can cause serious issues with the model, including data loss or corruption.
Bonus Tip! At this time, Autodesk does not provide any official tools to centrally push out updates over a network. However, the Desktop App does store a copy of installation files on a local machine, typically as an MSI, which can be pushed out using SCCM, PDQ Deploy, or similar management tools. This can also be redirected to a network share.

Assign Your Licenses
For this task, the Contract Manager or Software Coordinator logs your company’s Autodesk Account.
You will then go to the Users view. If the users who require the software do not exist, you can add them on that page.


Critical Note: When you create a new user, the user MUST log into their new Autodesk Account in order to properly access C4R. Once this is done, a green check mark will appear in the Status column of the user’s row.
Once the user is created, or if they already exist, add the seat with the Edit Access button in the user’s row.

Place a check mark next to BIM 360 Collaboration For Revit. Note that if you have multiple C4R contracts, all of them will appear on that page.

Assign Your Team Hub To A Contract
In order to ensure that your Team Hub is active, you must assign it to an existing C4R contract. Note that if your contract expires for any reason (e.g. you forgot to renew it), the Team Hub will go into expiration mode, and you will need to reassign the hub.
This process is described in detail at the following Autodesk webpage:
BIM 360 Team: Contract Assignment Workflow
Bonus Tip! Autodesk will generate the URL for the Team Hub automatically. If you want to change the URL, send an email to askA360@autodesk.com with the details, including the current and preferred URL.
Update The Name Of The Team Hub
By default, Autodesk will set the name of your Team Hub to the name of the Contract Manager. Have the Team Administrator access the admin panel:

In the Admin panel, select Team Information.

Then, select Edit and change the name. Note that Autodesk automatically adds the word “Team” as a prefix, so you do not need to do so.

Setting Up Your First Project
Autodesk has a basic guide to setting up a Project, and how to enable Revit models for collaboration: How to Get Started with Your A360 Collaboration for Revit Subscription
Note that you MUST use the Collaborate function in Revit in order to collaborate on a model. If you upload a Revit model directly to a Project, that is only stored as a data file.
Invite Project Contributors
In your Team Hub, browse to the Project. On the right side, there should be a button to invite a Project Contributor.

Publish Frequently
As a Cloud service, the data on your Collaboration for Revit models is stored at the C4R servers (which are actually Amazon’s S3 data center in Virginia). The local machine only has a cache of data, and the “Create New Local” and “Detach From Central” options are grayed out when using Collaboration for Revit. The Cloud-enabled models are available not only through Revit, but also via the BIM 360 Team web interface.
Collaboration for Revit has a specific function to make the latest version of a model available via the web interface, called publishing. Once a model is published, you can download any published version via your A360 Team Hub.
We recommend you frequently publish your models for several reasons:
- If you ever need to access an earlier version, the most efficient way to do this will be to download a recently published version. If you roll back to an earlier STC, this will delete all newer versions, and orphan anyone who is still connected to the model.
- When you publish a model, you can download it for offline storage.
We have a more thorough blog post on how to publish your models for backup and offline storage purposes here: Microsol Blog: Backing Up A360 C4R Models
Compacting Models and Offline Maintenance
At this time, Autodesk does not have an option to compact an active Collaboration for Revit model, and much of the maintenance should be done offline. We recommend the following procedure to clean up and compact your models:
- Publish your model.
- Download the published model.
- Compact and perform additional maintenance on the model.
- Enable the new model for collaboration, via the normal procedure in Revit.
Roger Liucci, our BIM and 3D Printing Specialist, also has a guide for guidelines for maintaining Revit Models: Revit Project Maintenance Guidelines
You may want to use a naming convention for your models to indicate the latest version, as this may result in a proliferation of models. You may also want to remove earlier versions from Collaboration for Revit, though of course we recommend you have local backups of any model prior to deletion.
If you are working with another architecture firm or another 3rd party, it is critical that you coordinate on a maintenance schedule.
BIM 360 Status
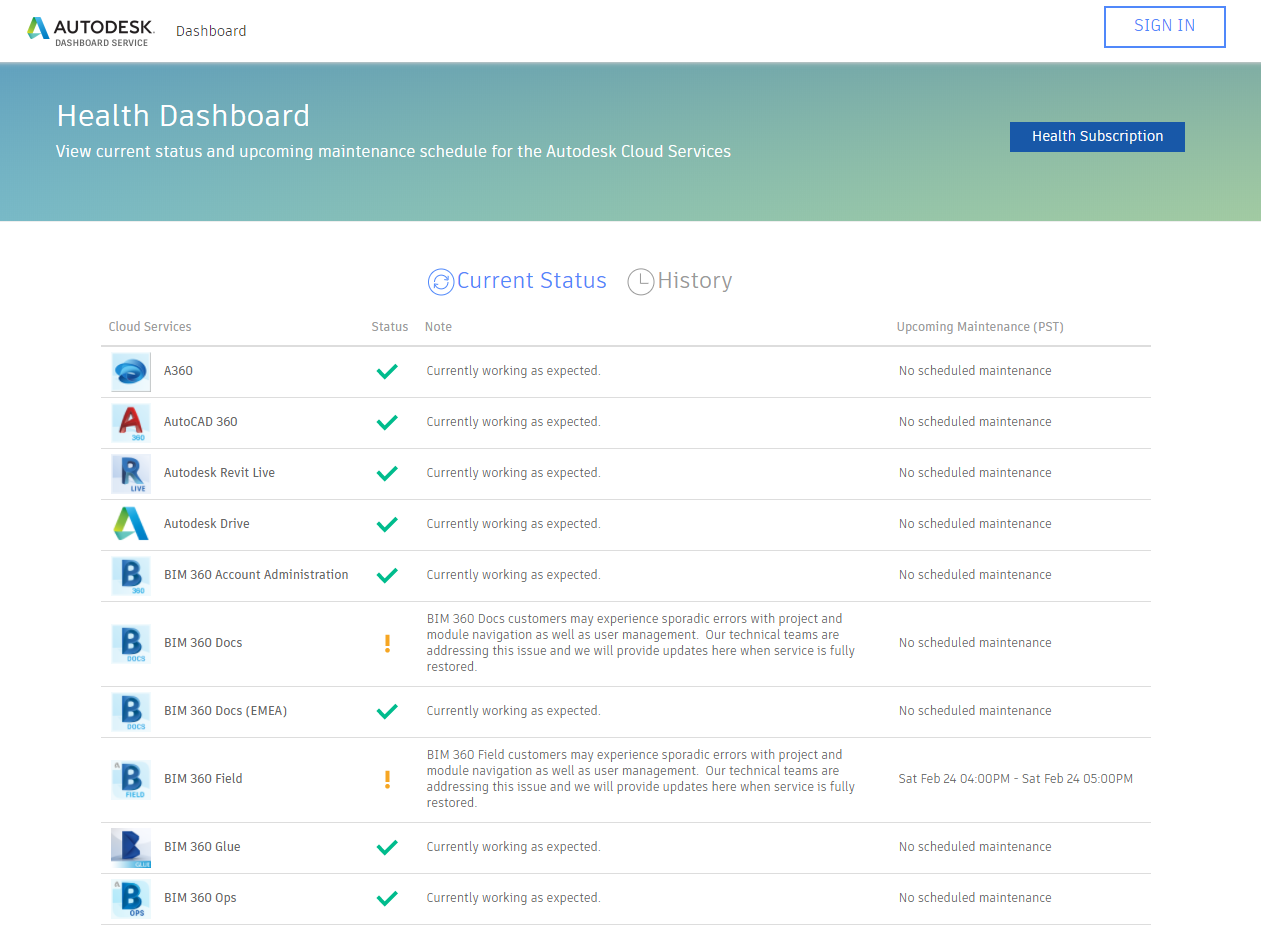
As with many other Cloud services, Autodesk publishes a status page. If you notice any issues with Collaboration for Revit, we recommend you check this page first. You can also use that page to report an issue, though please note that this does not generate a ticket with Autodesk Support.
Autodesk Health Dashboard Service

Critical Note
When users start to work on C4R, it is critical that the contributors use their own Autodesk Account credentials when working on models. This is a requirement, for two different reasons.
First, the credentials are used to verify the license usage. If users repeatedly use the same credentials simultaneously on multiple workstations, that is a license violation.
Second, the Autodesk Account name is used as the Revit User Name when working on the model. This not only tracks the user’s identity in Sync With Central, it also keeps track of ownership of elements and worksets. If those elements are manipulated by two different computers, using the same Revit User Name, the model will not be able to properly track changes, and this can corrupt the model.
If you have questions about these procedures, please email us at support@microsolresources.com or by phone at 888-768-7568.
INDUSTRIES:


