


Material Library for Enscape Software
By David Spergel | Virtual Reality, Visualization
Either via the Enscape toolbar in that CAD, shown here in Revit and SketchUp

Or, via the Material Editor menu option:
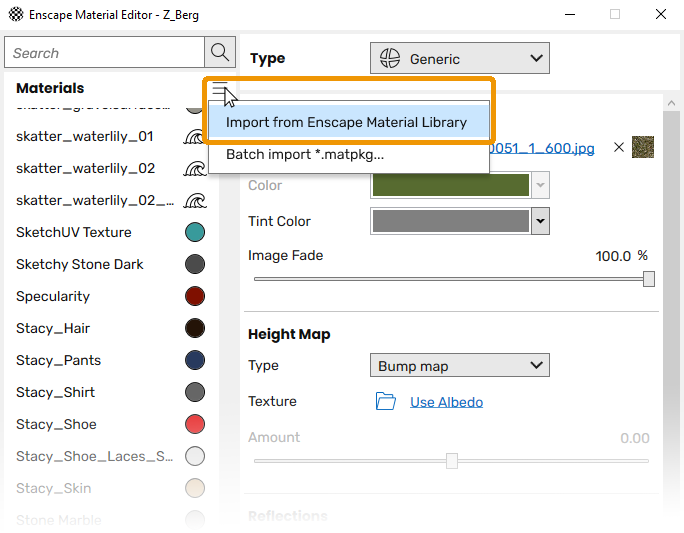
Either way will result in the Material Library dialog opening:
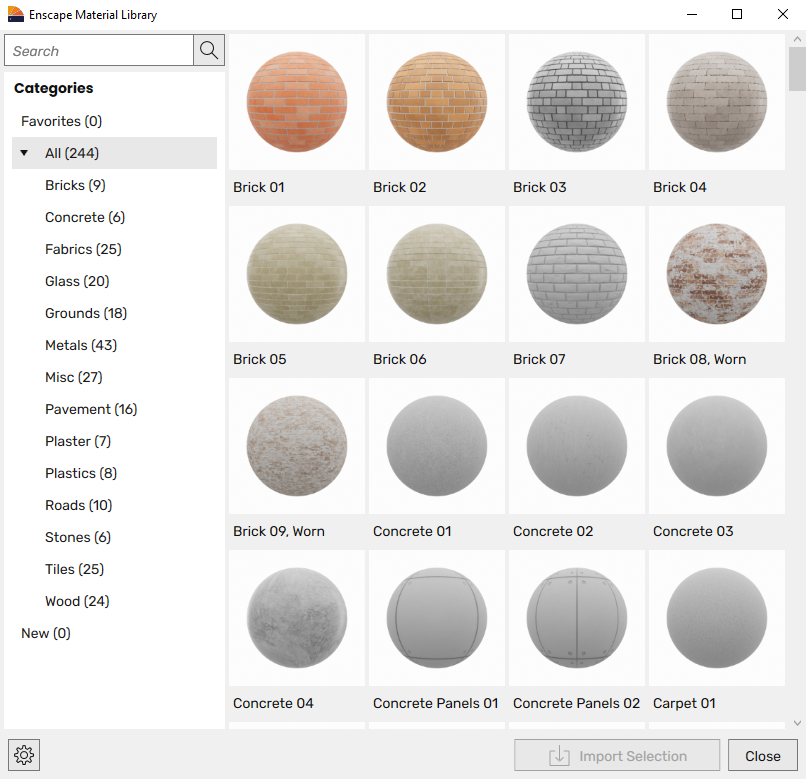
The Enscape Material Library dialog window
Being one of Enscape’s Core Features, where a license is invalid expired, whether that be a full or the 14-day trial license, or there are no seats available on a floating license, then the Material Library will be blocked from being used and you will see a notification similar to that shown below, depending on the cause.

The Enscape Material Library dialog window
Pressing the ‘gear’ icon at the bottom left of the dialog, therefore, allows you this option to easily share projects by changing the location where textures are imported and stored whilst also providing a warning dialog about modifying already imported textures that reside on the storage path, as well as a warning about relocating them to another location. This feature can allow you to store materials on a shared network drive for example.
Click on the Folder / Path link to change the storage location of imported textures, once you have selected your storage path, hit Save to close the Imported Texture Path dialog.
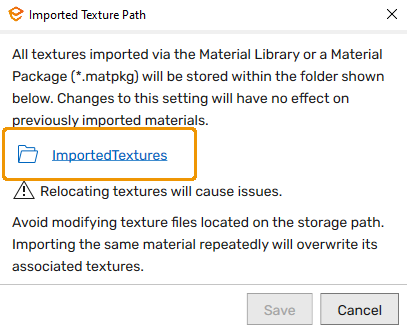
Imported Texture Path
Offline Material Download Link
Pressing the ‘gear’ icon at the bottom left of the dialog, therefore, allows you this option to easily share projects by changing the location where textures are imported and stored whilst also providing a warning dialog about modifying already imported textures that reside on the storage path, as well as a warning about relocating them to another location. This feature can allow you to store materials on a shared network drive for example. Click on the Folder / Path link to change the storage location of imported textures, once you have selected your storage path, hit Save to close the Imported Texture Path dialog.
Working with the Material Library
Furthermore, you can Favorite materials by clicking on the star buttons in the top left corner of the tiles. These are then shown in the Favorites folder. Just click on the star again so it is not solid to remove materials from the Favorites folder.
New materials that get added over time by Enscape will show in the New folder, as well as be listed under their respective category.
Favorite and select a material to be imported to the Material Library
Once the import process has finished you will find the material listed in the Enscape Material Editor, where you can further edit the material if required.
Make sure to refer to the relevant CAD articles you will find listed here to understand how to work with the Enscape Material Editor with the CAD you are using Enscape with, including how to import *.matpkg files.
Material imported into the Enscape Material Editor
Replace Materials in CAD
Current materials in the CAD model can be replaced with ready-to-use materials from the library. This can be performed by the material editor. This is illustrated in corresponding to the Materials in CAD article for your CAD and can be found here.
Need more information about Enscape?
Click here to learn more about Enscape, or to contact our visualization experts at enscape@microsolresources.com.
INDUSTRIES: Architecture, Buildings