As of April 30, 2025, we’re proud to announce our exciting new chapter. | Read more here.
Here are my top 12 tips for utilizing Revit groups. Ten was just not enough. In my opinion, groups can be the most abused tool in the toolbox. So why do we use them?
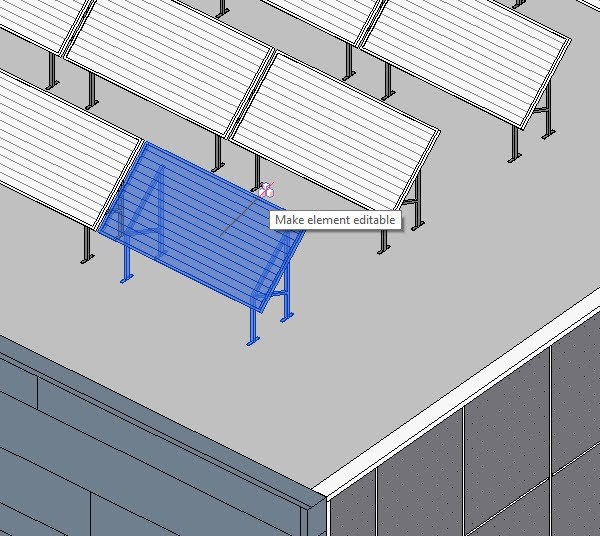
Well, it seems to be a no brainer. Like in AutoCAD, architects, MEP engineers, and construction professionals create groups of repetitive and yet still quantifiable elements as if they were individual elements. Modify one instance of the group, and Revit will update every instance of that group in the entire project. One can even exclude an element from a group instance to make an exception. Select the group, hover over an element in the group, and tab in until the specific element is highlighted, then left-click. That element now displays a symbol, which will allow us to exclude it from this group instance. See the image below. This does not make this group a new group. Pretty cool.
Of course, groups can be made in CAD, but in Revit, groups are broken down into model groups and detail groups. Detail groups for annotation, text, and detail items like 2-dimensional detail components. Think clips, brick, or flashing. These groups can be exported out to the library and imported as groups into other projects. Model groups typically hold Revit families. The two types of elements, detail and model, cannot be created in the same group. They are managed separately. Let’s now discuss the methods of creating groups and the various benefits of doing so.

Create a group by selecting elements or existing groups and using the Create Group tool.
Over the years, Autodesk and the Building Information Modeling (BIM) team have improved this excellent tool. This process to edit a group is as simple as a double click, but they have not made groups more flexible. If we create a group the wrong way, Revit gets upset. You don’t want to see Revit upset. In actuality, Revit gets confused. The main problems occur when groups contain elements that are constrained outside the group. In the simplest form, if one were to create a group of elements, including a door, the wall where the door is hosted would need to be within that group. The wall could have a top constraint that does not apply to all instances. It is also common to create groups for casework that rely on the walls for placement, but the walls are not part of the group. In class, you may have heard me say, groups should be “self-centered.” These types of constraints can also cause problems in Design Options.
That being said, yes, there are restrictions that one should be aware of when implementing the use of groups throughout a big AEC project.
We all should be considering what content from our successful Revit projects can be shared with the office and used in current and future projects. In the past, the Revit group had its file format. I’m dating myself now. Currently, Revit saves model elements as RVTs or Revit project files. These files can be loaded into the project and placed as groups. In the family environment, groups can be saved as RFA, Revit family files.
You can save a group as a project file (RVT) if you work on a project or a family file (RFA) if you are working in the Family Editor.
Revit’s group tools and functionalities are powerful if used carefully and thoughtfully. Getting the right training and having an organized approach is everything. Go forth and make groups as long as you and the team have a plan in place.
In a previous post, I discussed, “What Causes Revit Data Corruption?” and some model maintenance suggestions, “Revit Project Maintenance Guidelines.” I hope you find this article and those listed here helpful. I welcome you to reach out with questions or comments anytime.
Credits: About Best Practices for Groups from Autodesk Knowledge Network; Best Practices with Revit Groups: Rule #1 by Sean D Burke

Features the latest informative and technical content provided by our industry experts for designers, engineers, and construction firms and facility owners.
LEARN MORESTAY IN TOUCH