


How to Create Better Title Blocks in AutoCAD
By Pook Villegas | CAD
When it comes to creating technical drawings in Autodesk AutoCAD, title blocks are an essential element that provides crucial information about the design and its creator. A well-designed and organized title block adds a professional touch to your design and saves time for revisions or sharing a new drawing with others.
In this tutorial, I’ll be breaking down the process of creating a better title block in AutoCAD, from choosing the right layout to adding necessary information and customizing it according to your needs, as well as discussing some best practices to keep in mind.
How to Create Title Blocks in AutoCAD
To make things as clear as possible, I’ll be dividing the process of creating a title block in AutoCAD into five main steps.
Step 1: Choose your creation method
There are two primary ways to create a title block in AutoCAD: you can create a block with attributes that can be adapted depending on the sheet or create a .dwg file that will be used as an XREF (external reference) in your drawings. I’ll cover both in this tutorial and go into more detail on how to create a block, using each method, in step 4.
- Creating a block as an XREF: The benefit of creating a block as an XREF is that you can easily edit it in the source file, and all drawings referencing it will be updated accordingly. This is particularly useful for large projects with multiple drawings where consistency is critical. The first step in creating a block as an XREF is to create a title block template .dwg file. A .dwg file is a generic AutoCAD drawing file that can be used as a template for other drawings. Once you have created your template, you can insert it as an XREF into your new drawings and customize it accordingly.
- Creating a block with attributes: The other method is to create a block with attributes, which allows you to input specific information directly into the title block in each drawing. This is useful for designs that require unique information, such as project number or address. However, remember that if you make any changes to the block, you’ll need to update it manually in each drawing.
Step 2: Plan out what your block will include
The next step is to plan out what information your title block should have. Some common elements include:
- Fields – List out fields that will automatically update with information from the drawing, such as date, sheet number, and author.
- Project Information – This includes project name, client name, location, etc.
- Scale – Indicate the scale of the drawing to avoid confusion during printing. Use the DWGUNITS command to change drawing units if needed.
- Revision History – Track changes made to the drawing by adding a revision history table or including revision notes in the title block.
- Fonts and Text Sizes – Choose a font and text size that are easy to read and consistent throughout the title block.
- Logo or branding – If you’re creating a title block for a company, it’s essential to include their logo or branding to maintain consistency and professionalism.
- Additional graphical elements – You can also add other graphical elements such as a border, company slogan, or design symbols to enhance the overall look of your title block.
Step 3: Set up your layout
Once you have a clear idea of what information you want to include in your title block, it’s time to set up your layout. This involves creating a template with the correct paper size, border, and title block placement. You can either create a new template from scratch or use an existing one and make modifications as needed.
Step 4: Create the actual title block
Now it’s time to start creating your title block using the tools in AutoCAD. Some tips to keep in mind here include:
- Use layers – Organize your title block elements into layers to make it easier to manage and edit.
- Use blocks – Creating smaller blocks for each section of your title block, such as a project information block or revision history block, will make it easier to manipulate and update.
- Align objects – Use the align tool to ensure that all elements are accurately placed within the title block. This will help maintain consistency and a professional look.
Creating an AutoCAD title block as an XREF
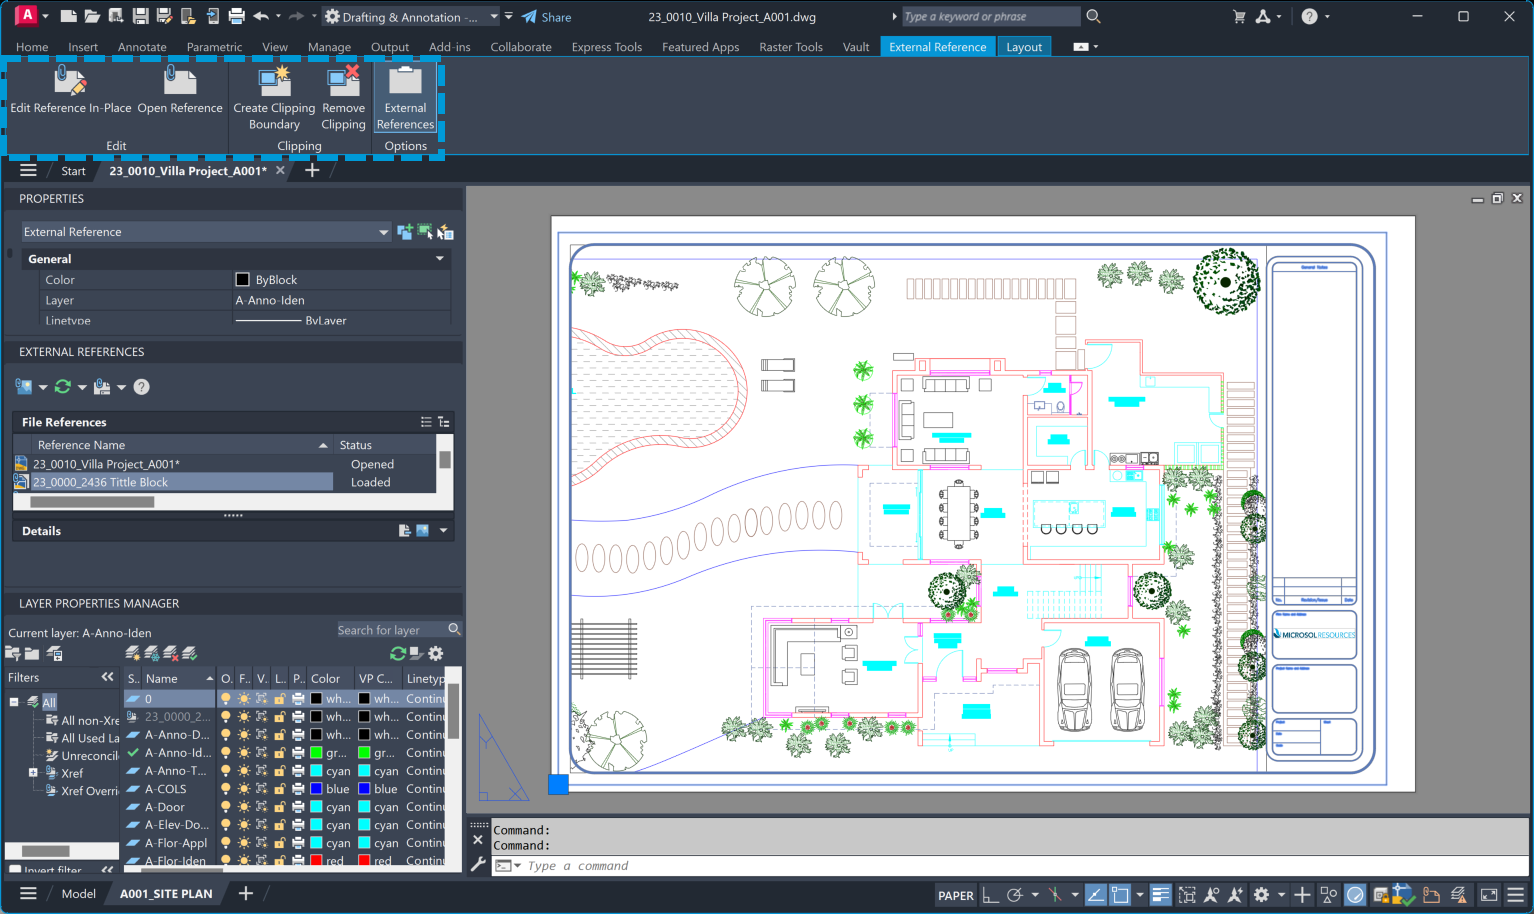
To create a title block as an XREF, you can follow these steps:
- Create a .dwg file with the title block layout you want.
- Save it as a template to use for future drawings.
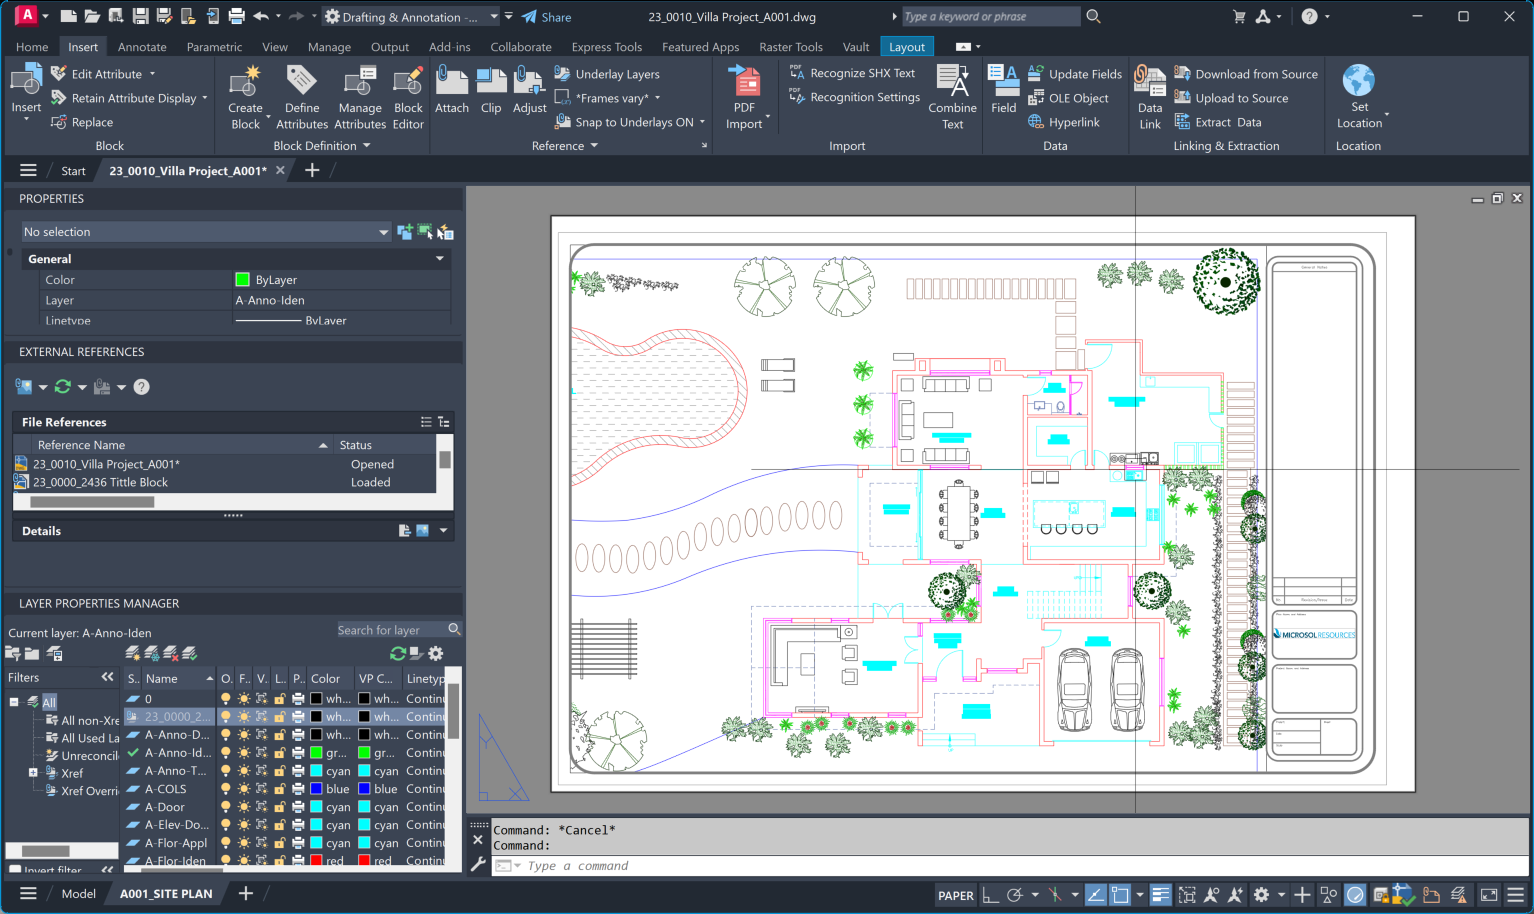
- In your new drawing, go to the “Insert” tab and click on “Attach” in the Reference panel.
- Browse and select your title block .dwg file.
- Check the “Specify on-screen” box and click OK.
- Place the title block in your drawing.
- Customize the attributes as needed.
- Save and repeat for each new drawing.
Creating an AutoCAD title block with attributes
To create a title block with attributes, you can follow these steps:
- In your new drawing, go to the “Insert” tab and click on “Block” in the Block panel.
- Select “Create Block” from the list.
- In the Block Definition dialog box, give your block a name and select “Specify On-Screen” as the insertion point.
- Click on all the elements you want to include in your title block and press Enter when finished.
- In the Attribute Definition dialog box, enter a tag and prompt for each attribute you want to include.
- Select “Invisible” as the default text and click OK.
- Place your block in the drawing and enter the necessary information for each attribute.
- Save and repeat for each new drawing, updating attributes as needed.
Step 5: Insert the title block into your drawing
The final step is to insert your newly created title block into your drawing. To do this, you can use the “Insert” command or the XREF method I mentioned earlier. If you choose to use an XREF, remember to make any changes in the source file and update the XREF in your drawing to reflect those changes.
Congratulations! you now know how to create a title block in AutoCAD using both methods. Remember to plan what information you want to include, set up your layout, and use layers and blocks for easier management. With these steps, you can easily create professional-looking title blocks for all your AutoCAD drawings.
How To Customize Title Blocks in AutoCAD
Now that you know how to create a title block in AutoCAD, let’s explore how you can customize it further. Here are some tips for making your title block stand out and reflect your unique style or company branding:
- Use custom fonts – Instead of using default AutoCAD fonts, you can install and use custom fonts to add a personal touch to your title block.
- Add color – Consider using different colors for text, lines, and other elements to make your title block more visually appealing.
- Incorporate graphics – Adding design symbols or logos can enhance the overall look of your title block and make it more recognizable.
- Use dynamic blocks – Dynamic blocks allow you to create multiple variations of a block with just one definition. This can save time and make it easier to update your title block when necessary.
- Create a template file – If you regularly use the same title block for different projects, consider creating a template file with all the elements in place. This will save even more time and ensure consistency across drawings.
Why Is It Essential to Incorporate Design Elements in AutoCAD Title Blocks?
Incorporating design elements in AutoCAD title blocks is essential for several reasons:
- Branding and consistency – Including company logos and branding helps maintain consistency across all drawings produced by a specific company. It also adds a touch of professionalism to the overall look.
- Visual appeal – Adding design elements such as colors, graphics, and custom fonts can make your title block more visually appealing and stand out.
- Easy identification – Design elements can make your title block more distinct, making it easier to identify and locate when working on a project with multiple drawings.
- Information organization – Using layers and blocks for different sections of your title block can help logically organize information, making it easier to manage and update in the future.
Best Practices for Title Block Management in AutoCAD
To ensure a smooth and efficient workflow when using title blocks in AutoCAD, here are some best practices to keep in mind:
- Plan ahead – Before starting any project, take the time to plan what information you want to include in your title block and how you want it organized.
- Use layers and blocks – As mentioned earlier, using layers and blocks can help manage and update your title block more efficiently.
- Keep it clean – Avoid overcrowding your title block with unnecessary information. Keeping it clean and organized will make it easier to read and update.
- Maintain consistency – If working in a team or for a specific company, ensure that all members follow the same standards and keep the title block consistent across all drawings.
- Regularly update – As projects progress and information changes, remember to periodically update your title block to reflect the most accurate and up-to-date information.
By following these best practices, you can effectively manage your title blocks in AutoCAD and save time in the long run.
Streamline Your Workflow with AutoCAD Title Blocks
Title blocks are essential in any technical drawing, and learning how to create and customize them in AutoCAD can significantly streamline your workflow. Following the steps outlined in this guide, you can easily create professional-looking title blocks that will help identify and organize your drawings while reflecting your unique style or company branding. Incorporating design elements, using best practices for management, and regularly updating your title block will ensure consistency and efficiency in all your AutoCAD projects.
INDUSTRIES: